
 Facebook
 Twitter
 Instagram
 YouTube
How To Track Form Submission in a Website Using Element Visbility in Google Tag Manager


When a visitor fills out a form on your website whether it’s an enquiry, contact, or registration form it represents a key conversion point. Tracking these submissions helps measure performance and user engagement.
Using Google Tag Manager (GTM), you can track form submissions accurately without manually adding tracking scripts, making it simple and effective for digital marketers and analysts.
Ensure GTM is Connected to Your Website
Before setting up any tracking, confirm that your GTM container is properly installed and linked to your website.
If GTM isn’t connected, no tag or trigger will fire.
To check :
1. Open Preview mode in GTM.
2. Enter your website URL.
3.Ensure a green “Connected” tick appears in Debug mode.
This confirms that GTM is correctly linked to your website and ready for tracking.
Learn How to Connect Google tag manager with Your Website
Know the Two Ways to Track Form Submissions
There are two main methods to track form submissions using GTM:
- Element Visibility Tracking Used when the form submission shows a “Thank you” or success message on the same page.
- Page View Tracking Used when the form redirects users to a separate “Thank You” or confirmation page after submission.
We’ll focus on the Element Visibility method first, as it’s most common when the form response appears without a page reload.
Learn How to Track Form Submission Using Page View In GTM
Track Form Submission Using Element Visibility
Element Visibility tracking monitors whether a specific on-page element (like a thank-you message) becomes visible after form submission. This is achieved using a CSS Selector to identify that exact element.
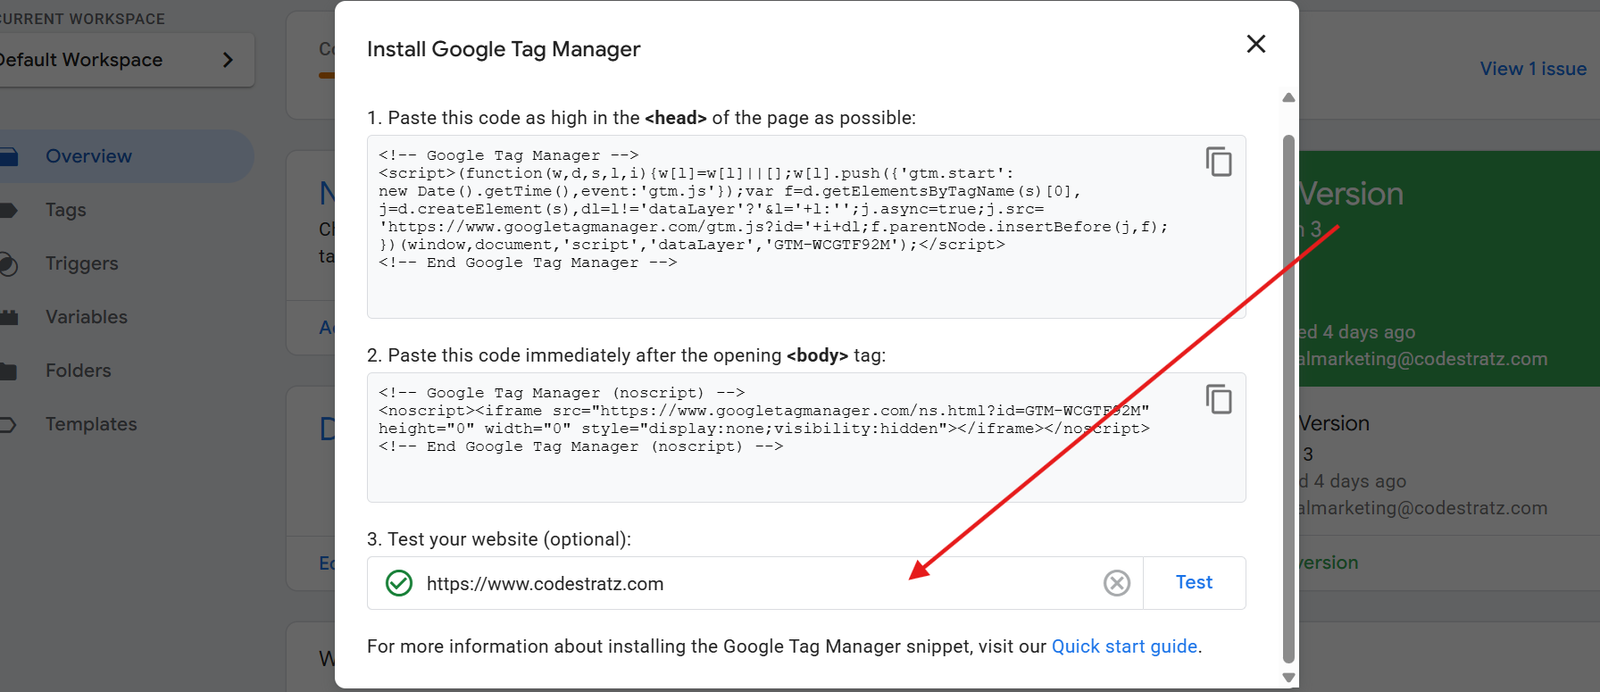
Step 1 :Copy the CSS Selector from the Website
Before tracking form submission using element visibility, we have to copy the CSS selector from the suitable form.
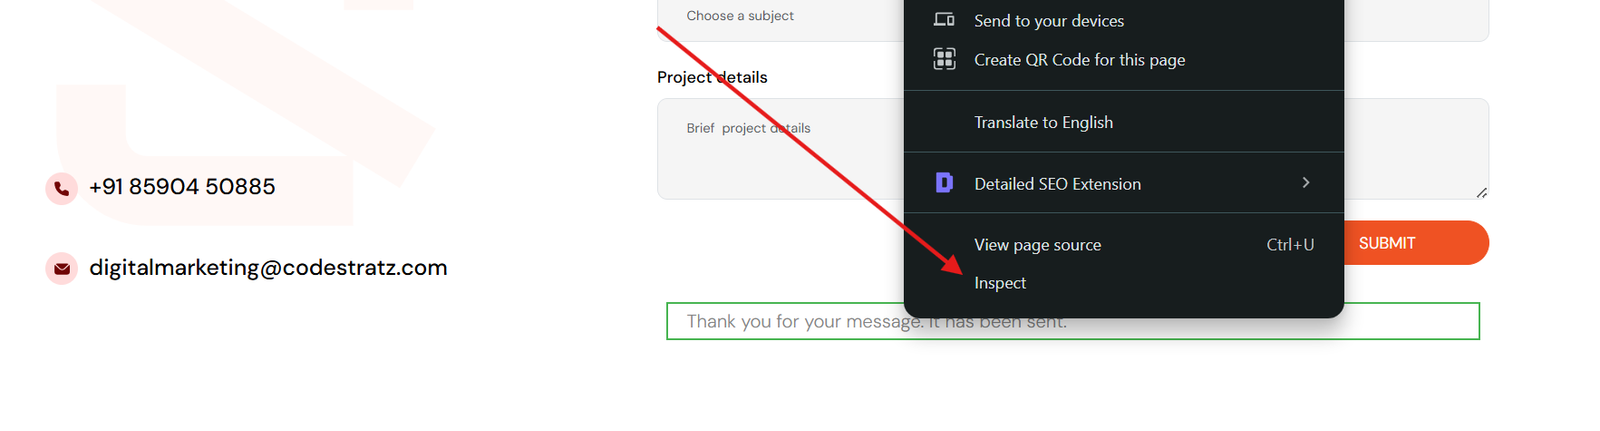
Step 1.1 :Go to your website’s form page.
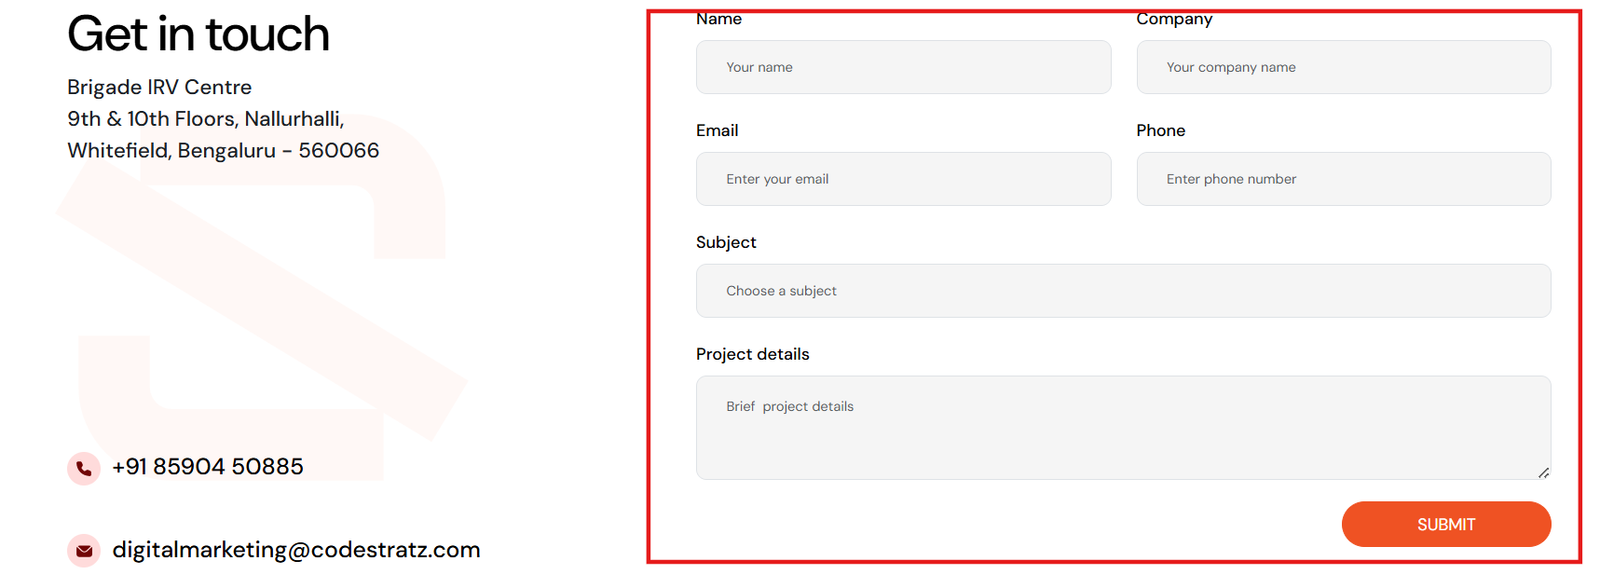
Step 1.2 : Submit the form to display the “Thank you” message.
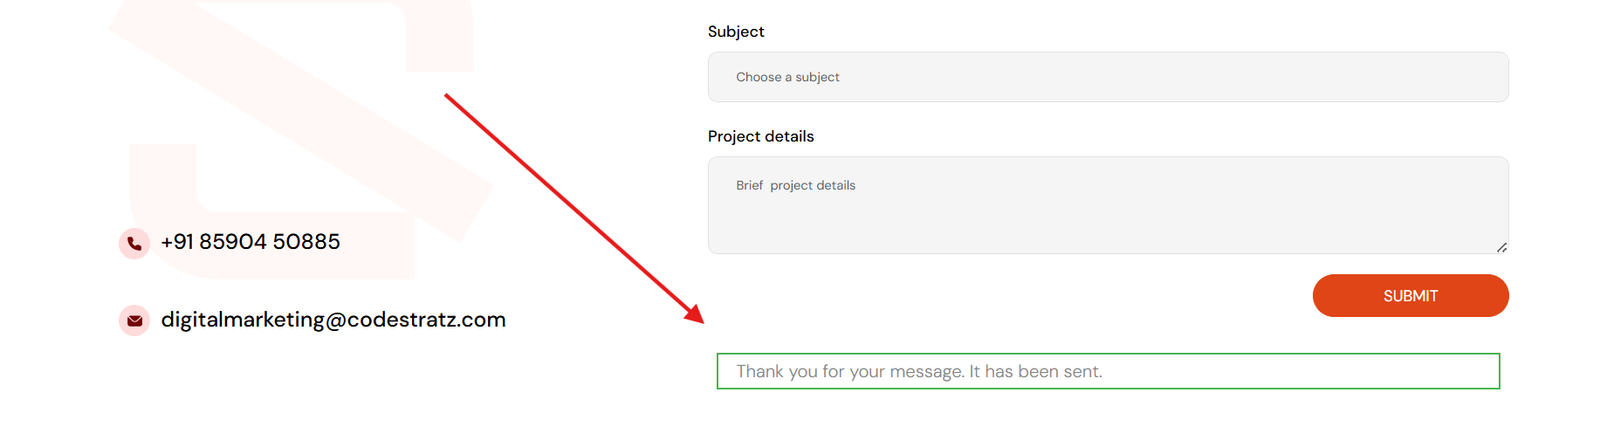
Step 1.3 : Right-click the message and choose Inspect.
Step 1.4 : From the HTML inspector, right-click the highlighted element, select Copy → Copy Selector, and save it.
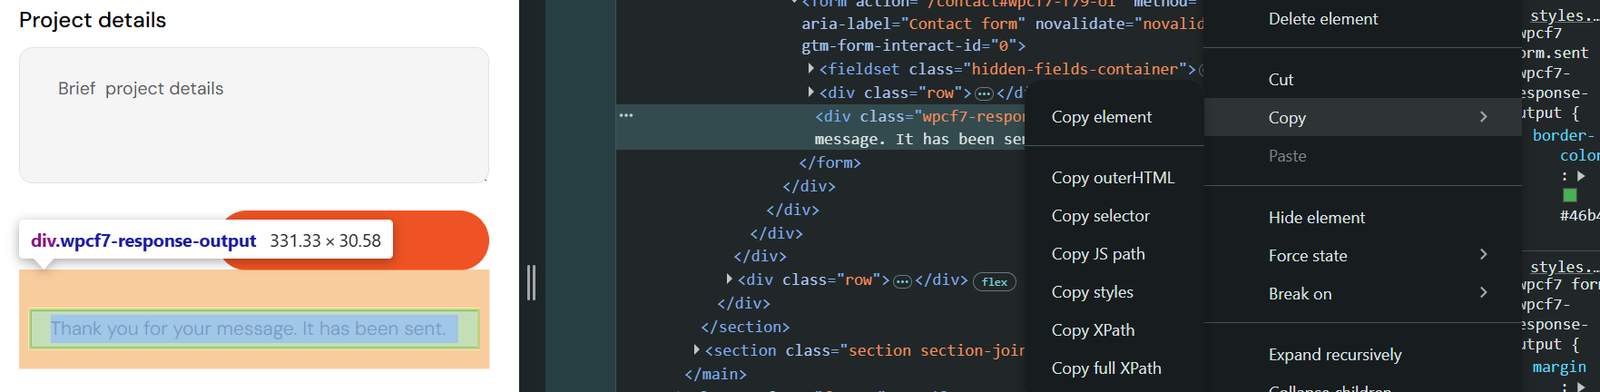
This selector uniquely identifies the element that confirms a successful form submission.
Step 2 : Create a Trigger in GTM
A trigger tells GTM when to fire a tag. Here, it will fire when the thank-you message becomes visible.
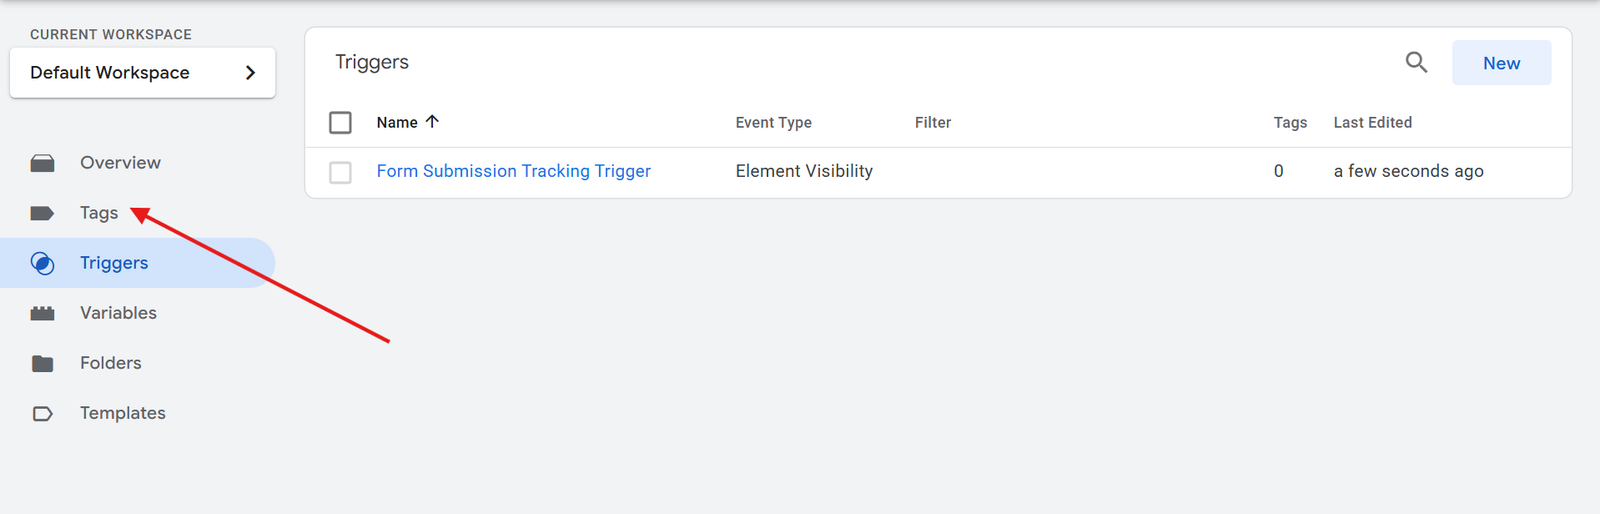
Step 2.1 : Open the Trigger Section in GTM
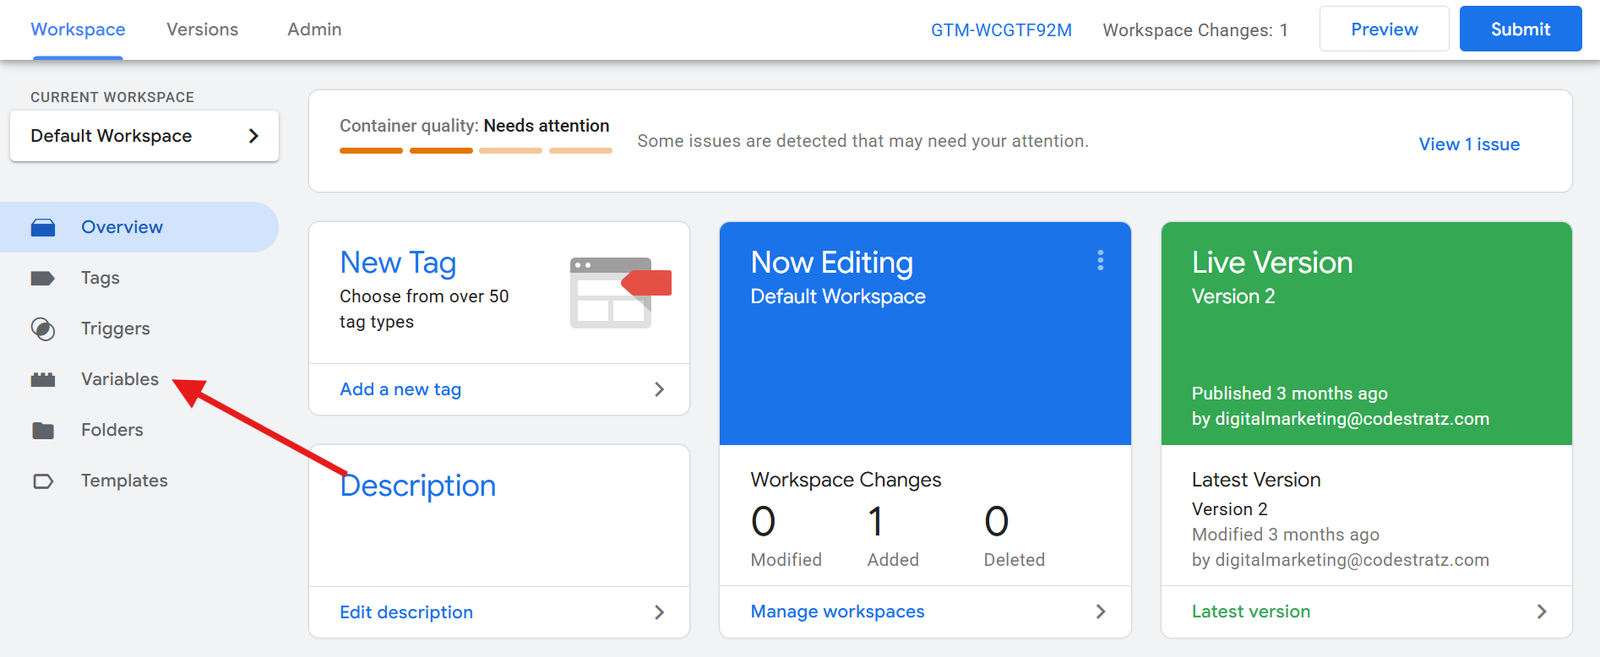
From your GTM workspace, click Triggers in the left menu to open your list of triggers.
Step 2.2 : Click “New” to Create a New Trigger
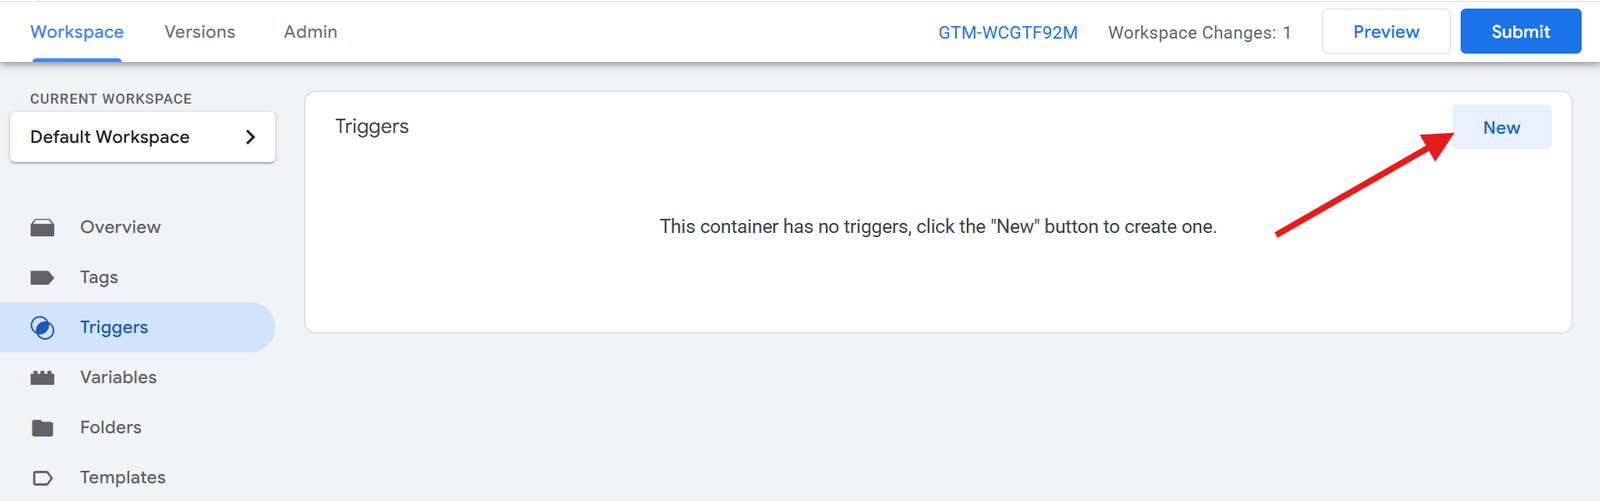
Press New and start setting up a fresh trigger for your form tracking.
Step 2.3 : Select “Element Visibility” as Trigger Type
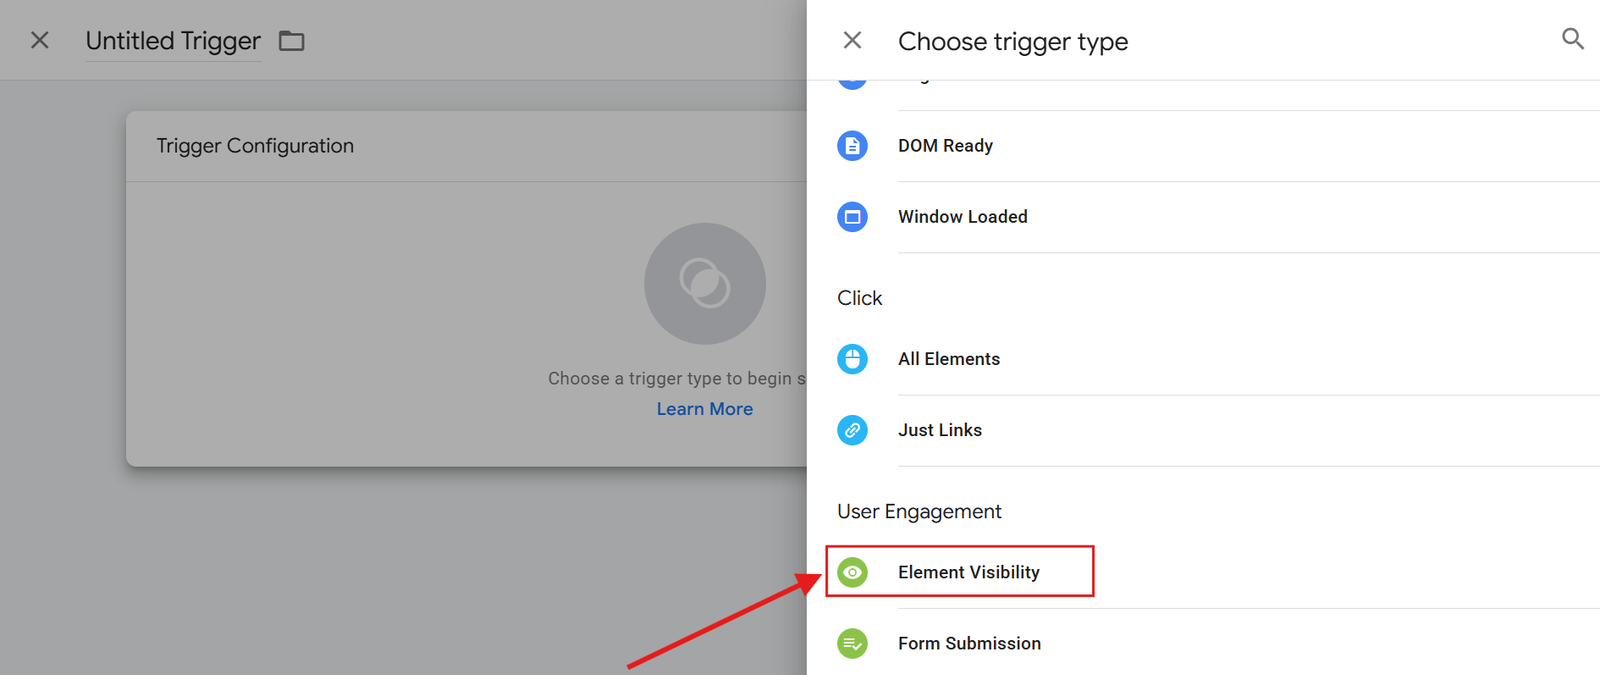
Click inside the Trigger Configuration area and choose Element Visibility from the list.
Step 2.4 : Name the Trigger and Choose “CSS Selector” Method
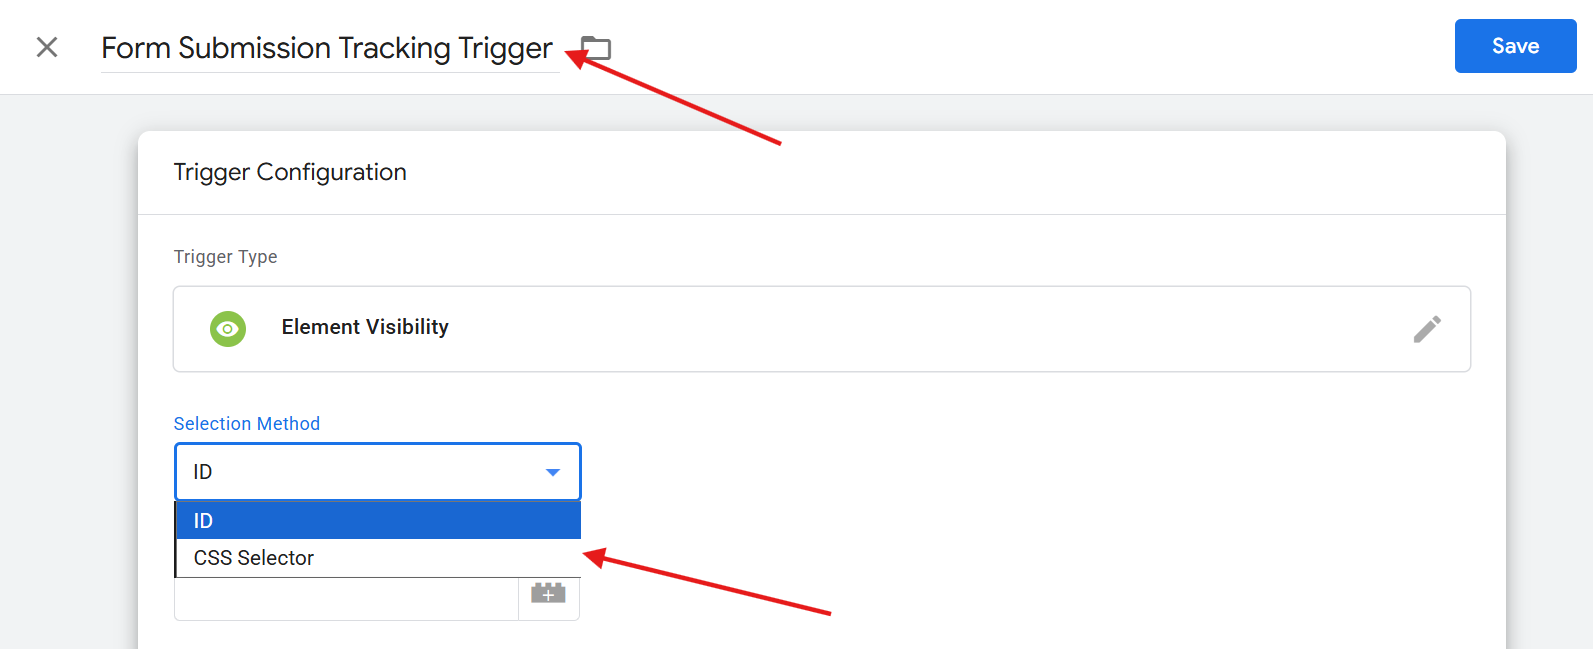
Give the trigger a clear, descriptive name for example : Form Submission Tracking trigger
Under the Selection Method, choose CSS Selector.
Why CSS Selector?
- It allows GTM to identify specific elements dynamically on your page.
- Not ID, because IDs might repeat or change across elements, while CSS Selectors remain consistent.
Step 2.5 : Paste the Copied Selector into GTM
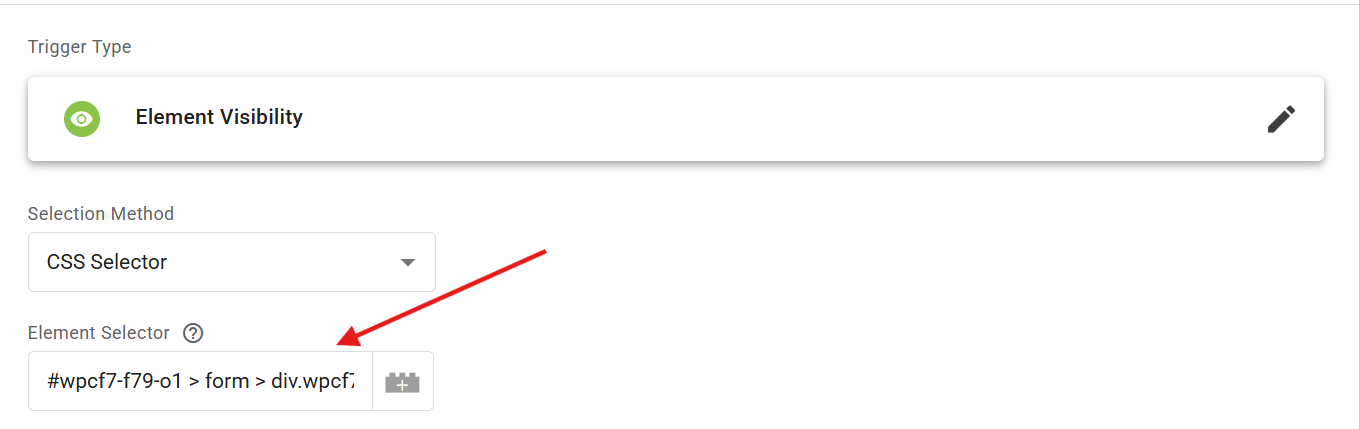
Paste the selector you copied earlier into the Selection Method field.
Example format: #form-response > div.thank-you
This ensures GTM recognises the exact element shown after submission.
Step 2.6 : Select “Once per Page” for When to Fire
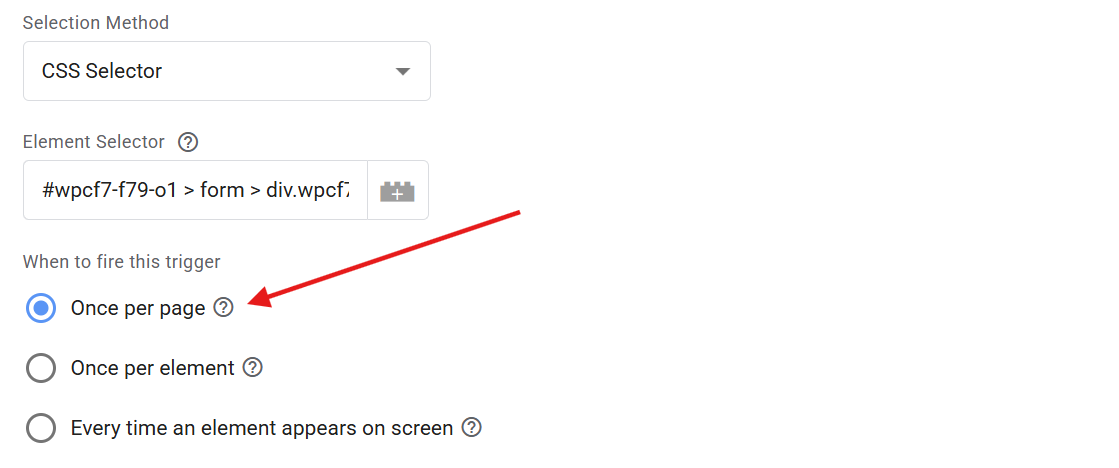
Under When to Fire this Trigger, choose Once per page.
Why “ Once Per Page “ for When To Fire This Trigger ?
This ensures the trigger fires only once during each page load preventing duplicate event tracking.
Other options:
- Once per element – Triggers once per visible element.
- Every time an element appears – Repeatedly fires if the element appears multiple times.
Step 2.7 : Set Minimum Percentage Visible to 100%
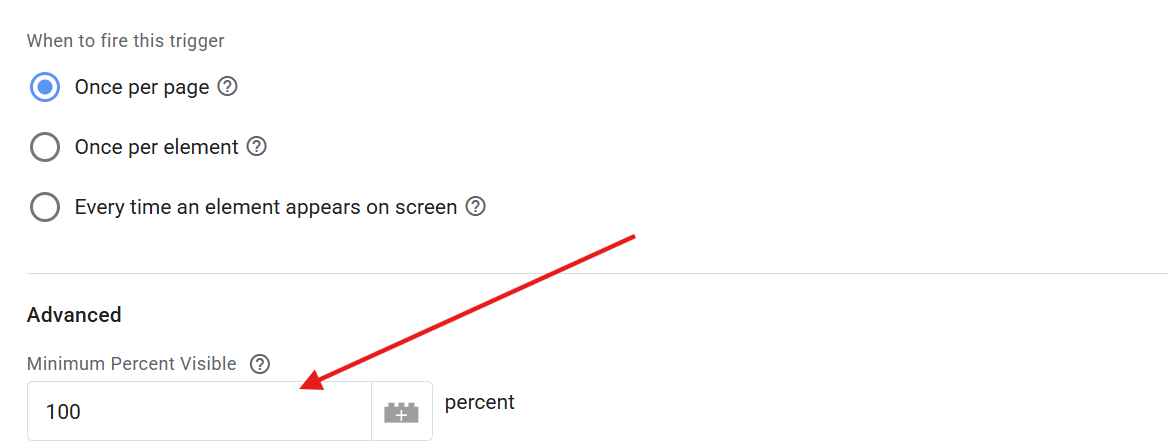
Enter 100 in the “Minimum Percentage Visible” field.
This ensures the element must be completely visible before GTM records the event, providing accurate results.
Step 2.8 : Tick the “Observe DOM Changes” Option

Tick Observe DOM Changes.
This helps GTM detect dynamically loaded elements useful when the thank-you message appears without a page reload.
Do not tick Set Minimum Onscreen Duration, as the thank-you message may appear briefly, and this could prevent firing.
Step 2.9 : Choose “All Visibility Events” for Trigger Firing
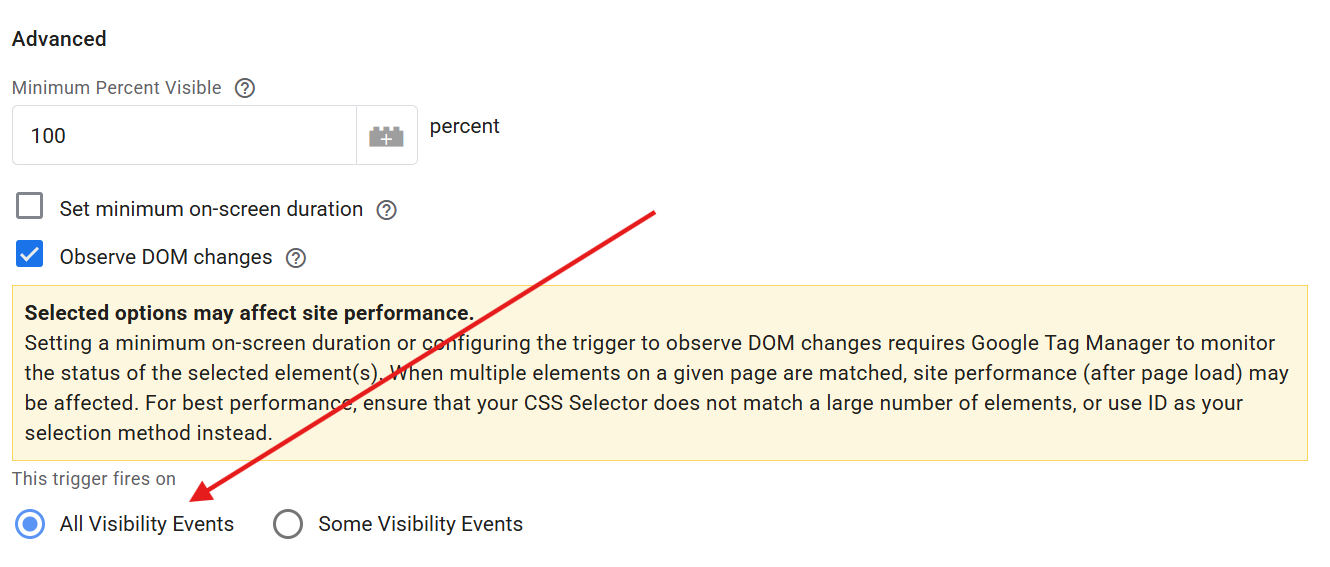
Select All Visibility Events under “This trigger fires on”.
This ensures all visibility events related to the selected element are tracked.
Selecting “Some Visibility Events” may cause data loss if your form or message structure changes slightly.
Finally, click Save to confirm your trigger setup.
Step 3: Create a Tag for Form Submission
Now that your trigger is ready, you need a tag to send the data to Google Analytics 4 (GA4).
Click On the New In Tag Section And Create A Tag
Give Your Tag a Clear Name

Name your tag clearly for example, GA4 Event – Form Submission Tracking Tag .
A clear naming structure makes it easier to manage multiple tags later.
Step 3.1 : Select “GA4 Event” as Tag Type

From the Tag Configuration panel, choose Google Analytics: GA4 Event.

Why GA4 Event?
Because this allows form submission data to be recorded as an event, which you can later mark as a conversion in GA4.
Step 3.2: Enter Measurement ID and Event Name
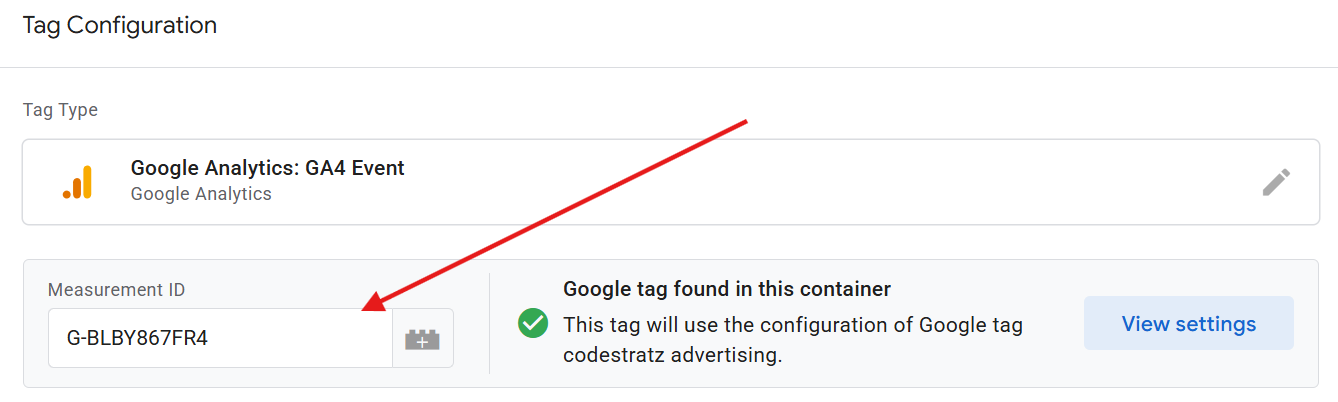
Measurement ID: Paste the ID from your GA4 property.
Make Sure The Tag is found In the Container is a “ green tick“
Event Name: Enter a clear, lowercase name such as form_submission.
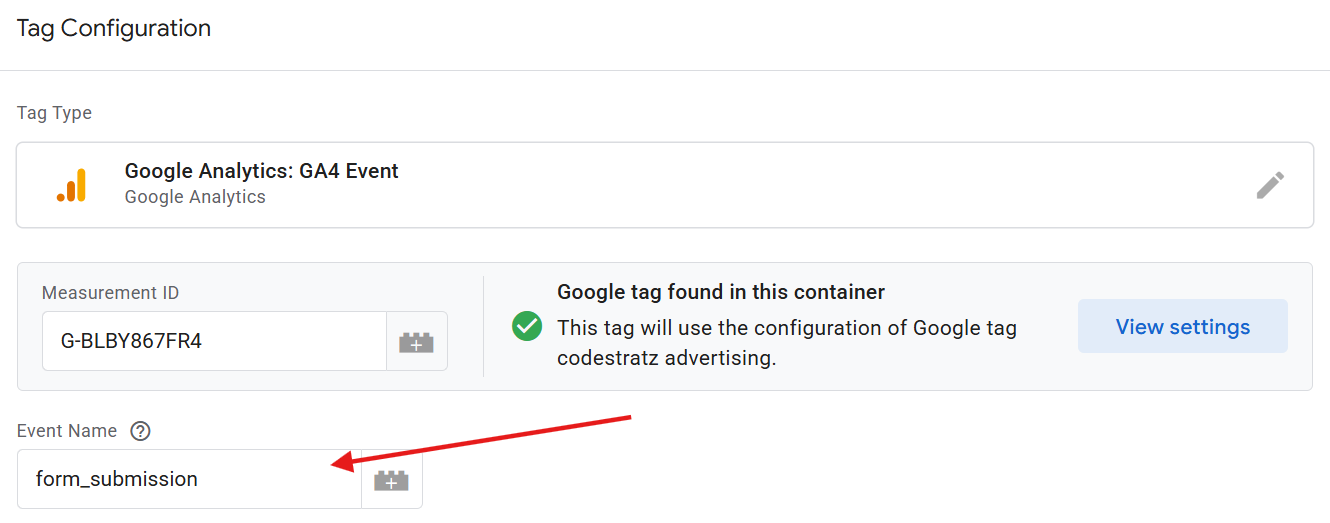
This naming format helps maintain uniform event tracking in reports.
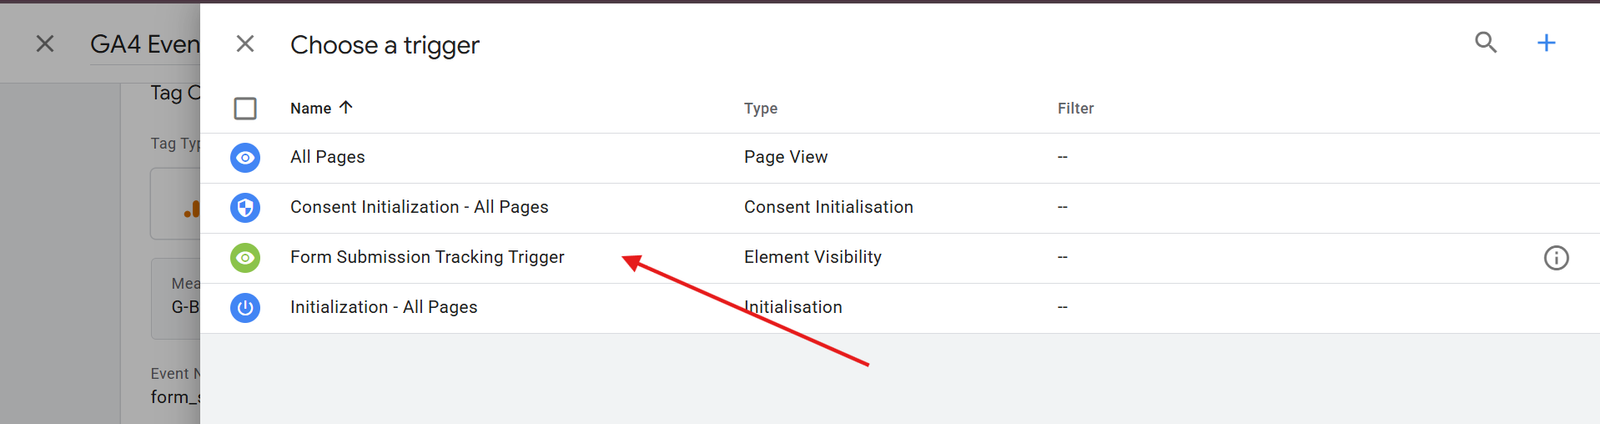
Step 3.3 Connect the Tag with the Trigger
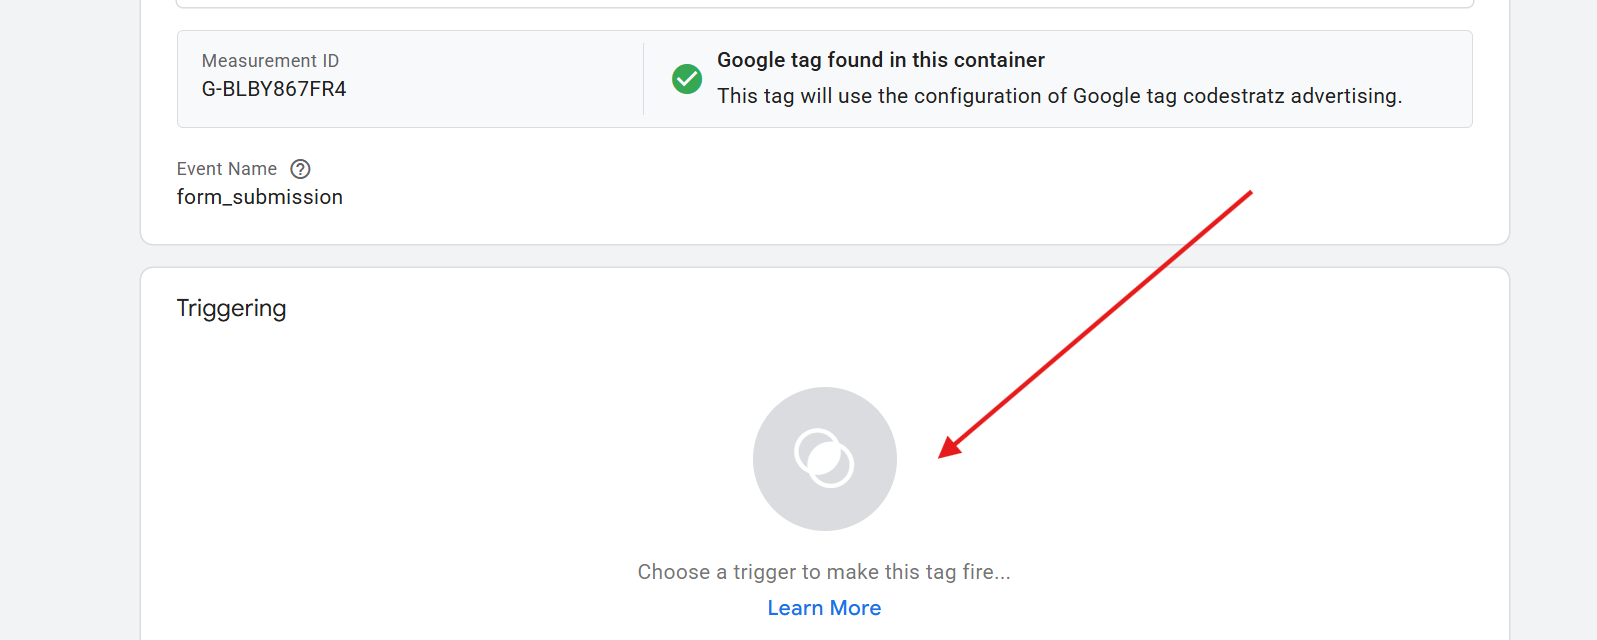
Under Triggering, select the trigger you created earlier –
Form Submission – Element Visibility.
Then click Save.
Step 4: Test the Setup in Preview Mode
Testing ensures your configuration is working correctly before publishing.
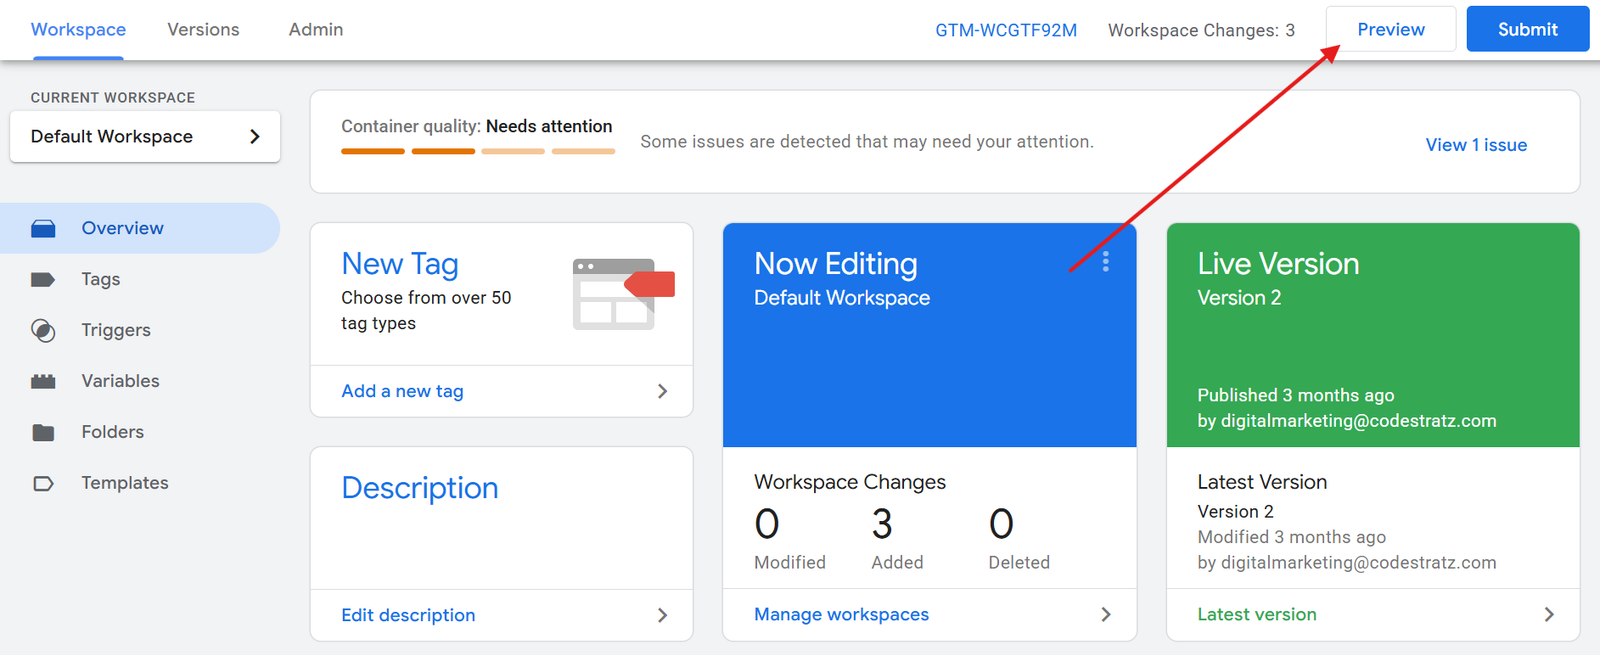
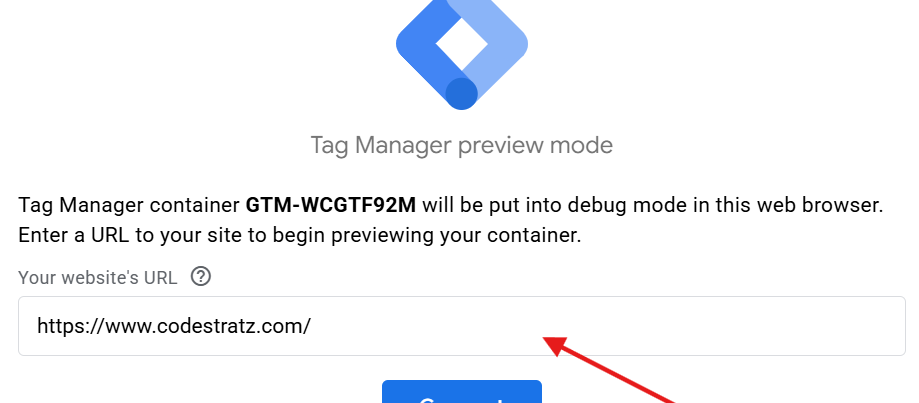
Enter Preview Mode in GTM
Click Preview at the top right of GTM. This will open Tag Assistant in a new window.
Step 4.1 Connect GTM to Your Website
Enter your website’s URL and click Connect.
This opens your website in Debug mode, allowing GTM to monitor tag firing in real time.
Step 4.2 : Verify Website Connection in Debug View

Once connected, you’ll see a green tick beside your domain name in Tag Assistant.
This confirms that GTM is actively monitoring your website.
Step 4.3 : Submit the Form and Check if Tag Fires
Now, go to your website and submit the form.
If set up correctly, the GA4 event tag should fire in the Tag Assistant’s preview panel.
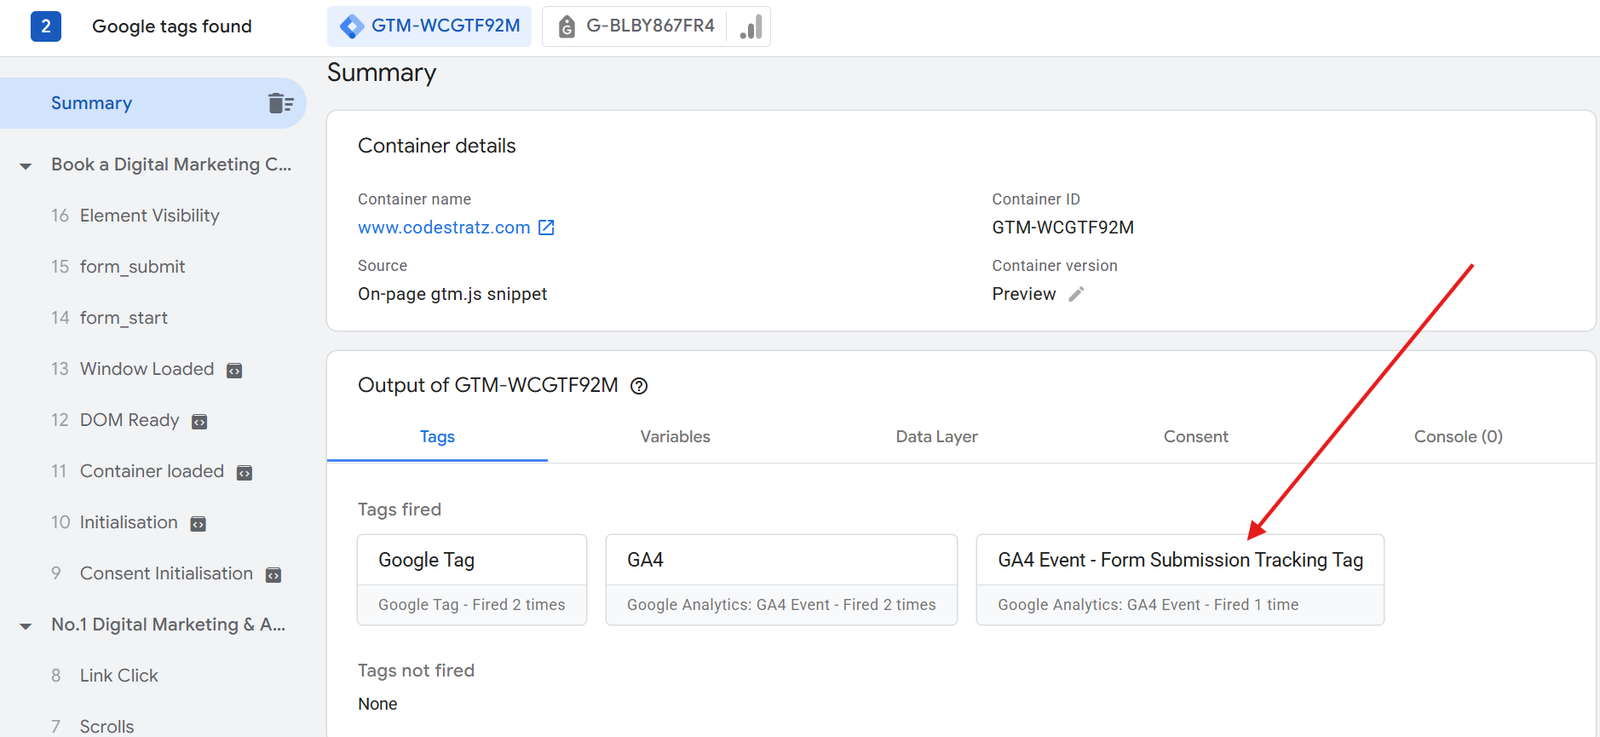
Step 4.4 : Verify Data in GA4 DebugView
Open Google Analytics 4 → Admin → DebugView and check if the event form_submission appears.
If it does, the data is successfully passing from GTM to GA4.
Step 4.5 : Submit & Publish The Tag
Once you’ve confirmed that the event is tracking correctly in GA4 DebugView, it’s time to publish your changes in Google Tag Manager.
Click “Submit” in GTM

At the top-right corner of your GTM workspace, click Submit.
This opens the Submit Changes window, where you finalise and publish your configuration.
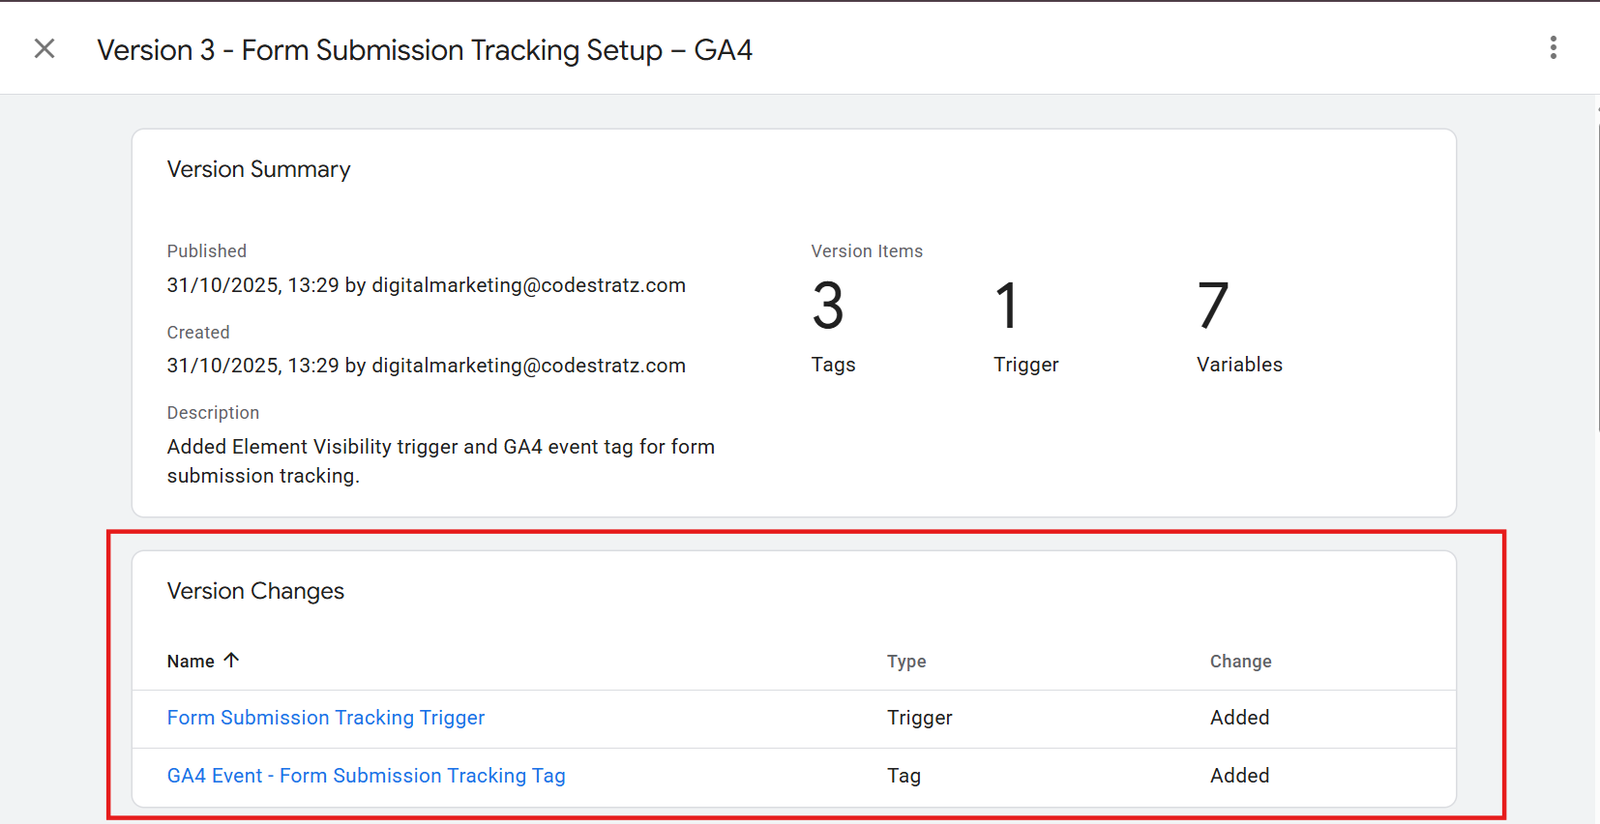
Step 4.6 : Provide Version Name, Description To Submit

Provide a clear Version Name, such as:
- Form Submission Tracking Setup – GA4
In the Description, briefly note what you added for example:
- “ Added Element Visibility trigger and GA4 event tag for form submission tracking”
This helps you and your team identify what changes were made if you revisit this version later.
Step 4.7 : Click “Publish” to Make It Live
Click Publish to make your tag live on the website.
Once published, GTM will start tracking real user form submissions immediately ; not just in preview mode.
Step 4.8 : Confirm Tag Is Live
After publishing, reload your website and submit the form again.
Open Tag Assistant and ensure the tag fires in the live environment.
You can also check GA4 → Realtime to confirm that new form submission events are being recorded.
You’ve successfully tracked form submissions using Google Tag Manager!
Your GA4 dashboard will now capture each form completion, giving you valuable insights into user behaviour and conversion performance.