
 Facebook
 Twitter
 Instagram
 YouTube
How to Track Thank You Page From Form Submission in Google Ads


Tracking form submissions is essential when running Google Ads because it helps you understand which campaigns bring real enquiries. When a user completes a form and is redirected to another page, that page becomes the conversion confirmation point. In this guide, we will learn how to track these page-redirect form submissions using Google Ads, ensuring your optimization is based on accurate conversion data.
Why Tracking Matters While Running Google Ads
Tracking allows you to measure what truly matters. Without conversion data, Google Ads cannot understand which users are valuable and which campaigns drive results.
Tracking helps you:
-
Identify campaigns and keywords that generate leads.
-
Improve bidding accuracy.
-
Remove budget waste.
-
Optimize campaigns based on real actions taken by users.
Forms Can Be Tracked in Two Ways
-
Using Element Visibility Trigger : When the form submits and the success message appears on the same page.
-
Using Page View Trigger : When the user is redirected to another webpage after submitting a form.
In this blog, we focus on How to Track Form Submissions That Redirect to Another Page in a Website Using Google Ads.
Ensure Your GA4 & Google Tag Are Properly Connected to GTM
Before you start tracking form submissions, it’s crucial to confirm that Google Analytics (GA4) and the Google Tag are correctly connected to your Google Tag Manager (GTM).
This ensures that every event you configure inside GTM is accurately sent to GA4 without data loss.
What this means:
-
Your GA4 Measurement ID must be added inside a Google Tag (Configuration Tag).
-
That Google Tag must be published through GTM.
-
Your GTM container must be installed on the website and firing correctly.
-
You should be able to see real-time event hits inside GA4 after triggering any action on the site.
Step 1: Take the Conversion Summary
Go to your Google Ads dashboard and open the conversions area.
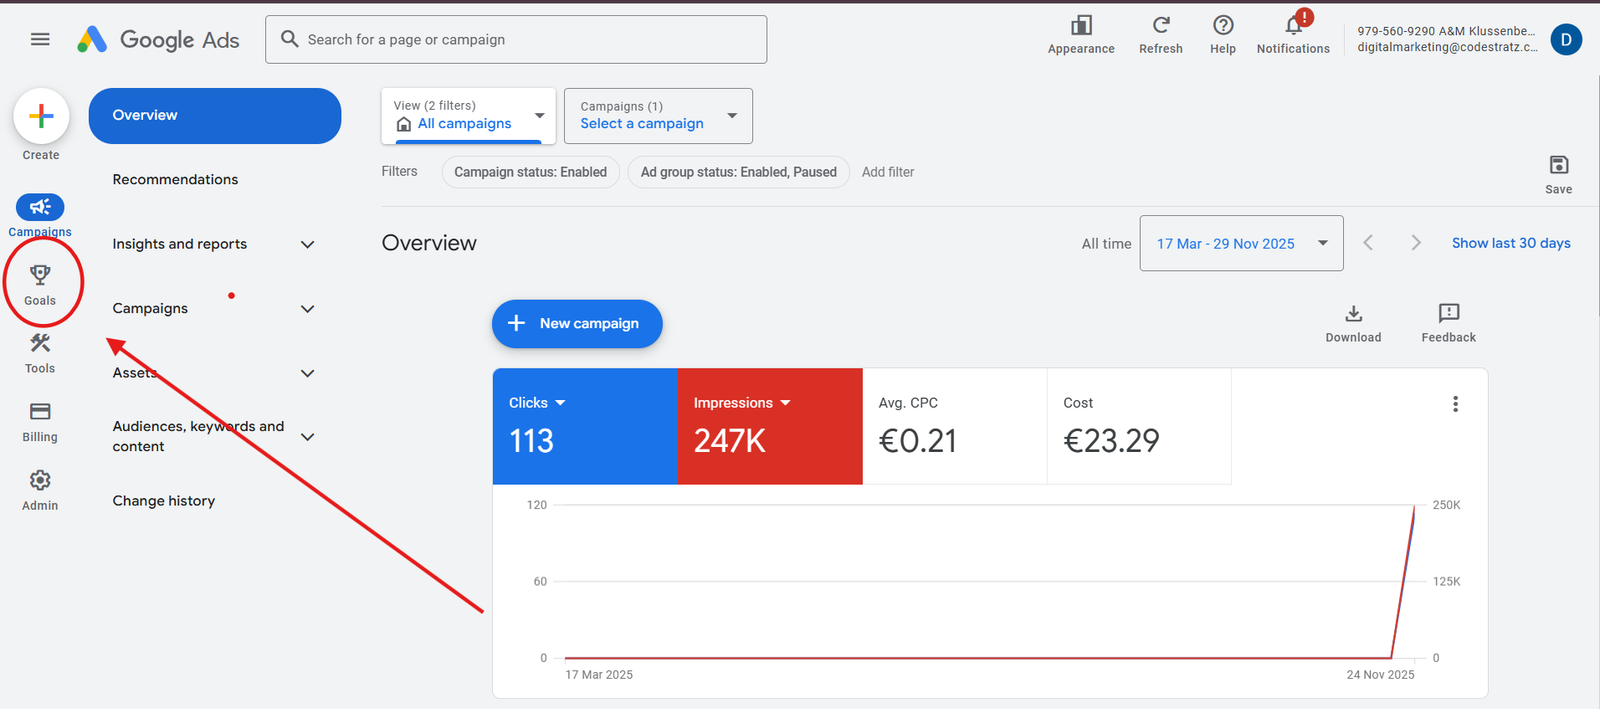
Then open Summary under Conversions.
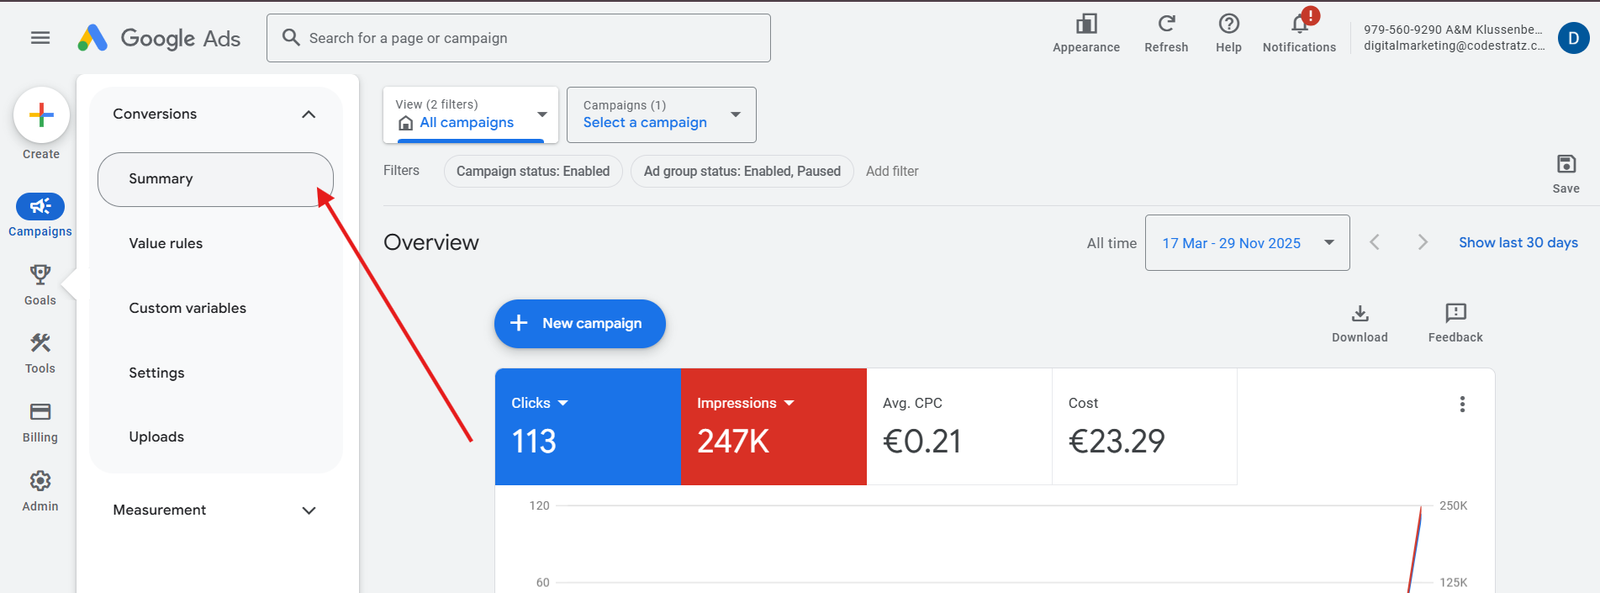
This section lists all conversion actions created in your account.
Step 2: Click “Create Conversion Action”
Select the option to Create Conversion Action.
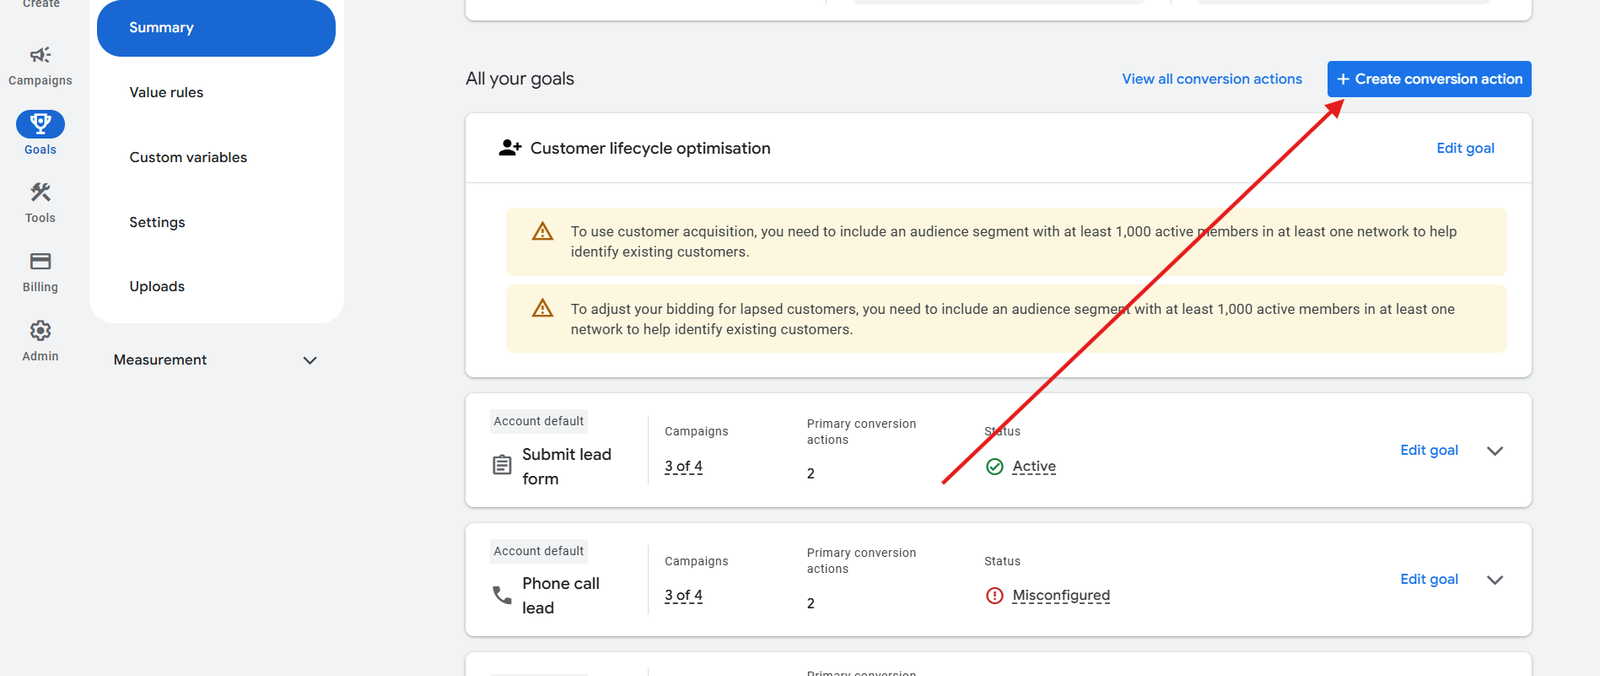
This starts the setup for tracking your form redirect.
Step 3: Select “Conversions on Website”

This tells Google Ads that you want to track website actions.
Make sure the tag is connected , otherwise it shows the message ” Google tag not installed ”
Why Didn’t We Select “App” and “Offline” Conversions?
-
App conversions apply only if you have a mobile application.
-
Offline conversions require CRM uploads or API integrations.
These are not needed for tracking website form submissions.
Step 4: Select “Submit Lead Form”
Choose Submit Lead Form as the conversion type.

This category matches the action you want to track.
Step 5: Select “Add Conversion Action”
Click Add Conversion Action under “What’s important for you to measure → Submit Lead Form”.
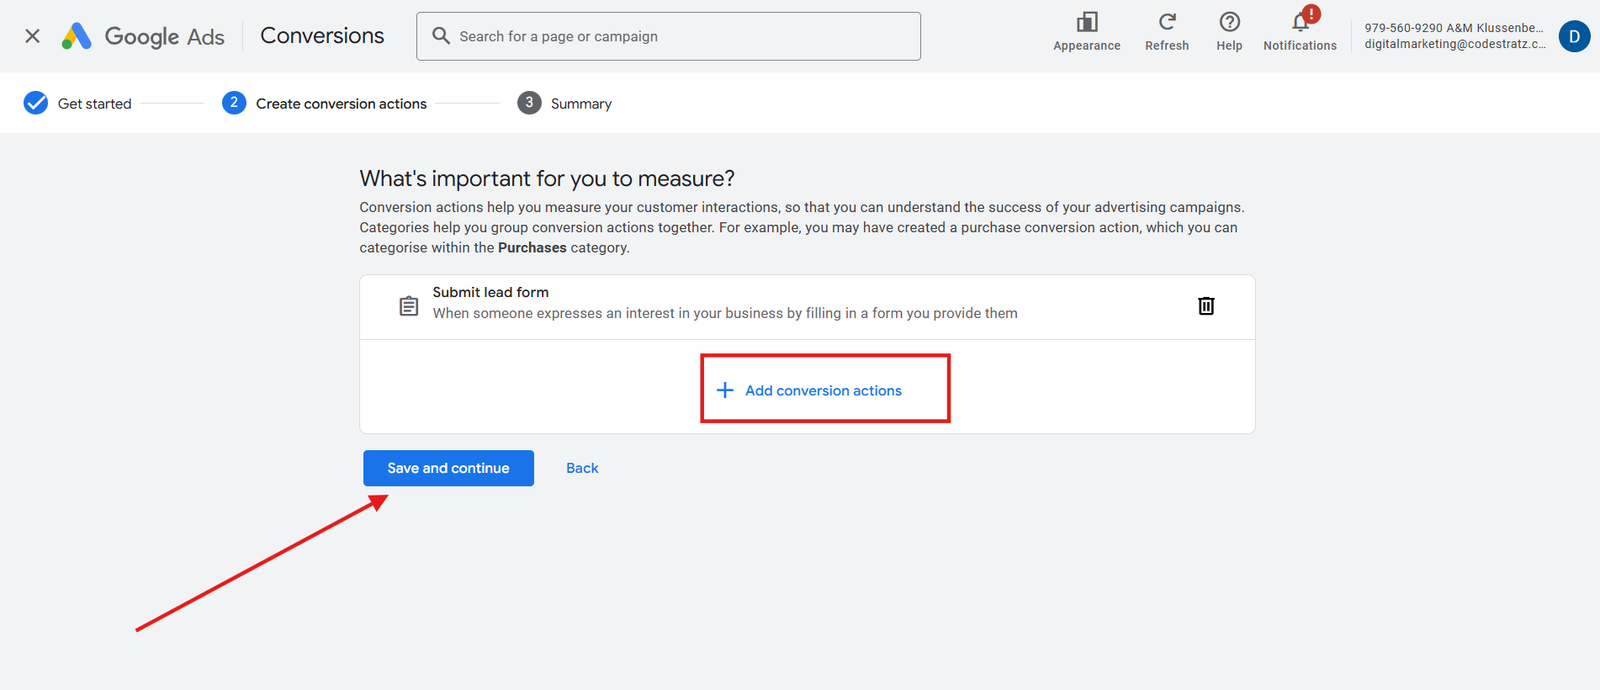
This opens the detailed setup.
Step 6: Select Web in That Option
Choose your domain from the dropdown.
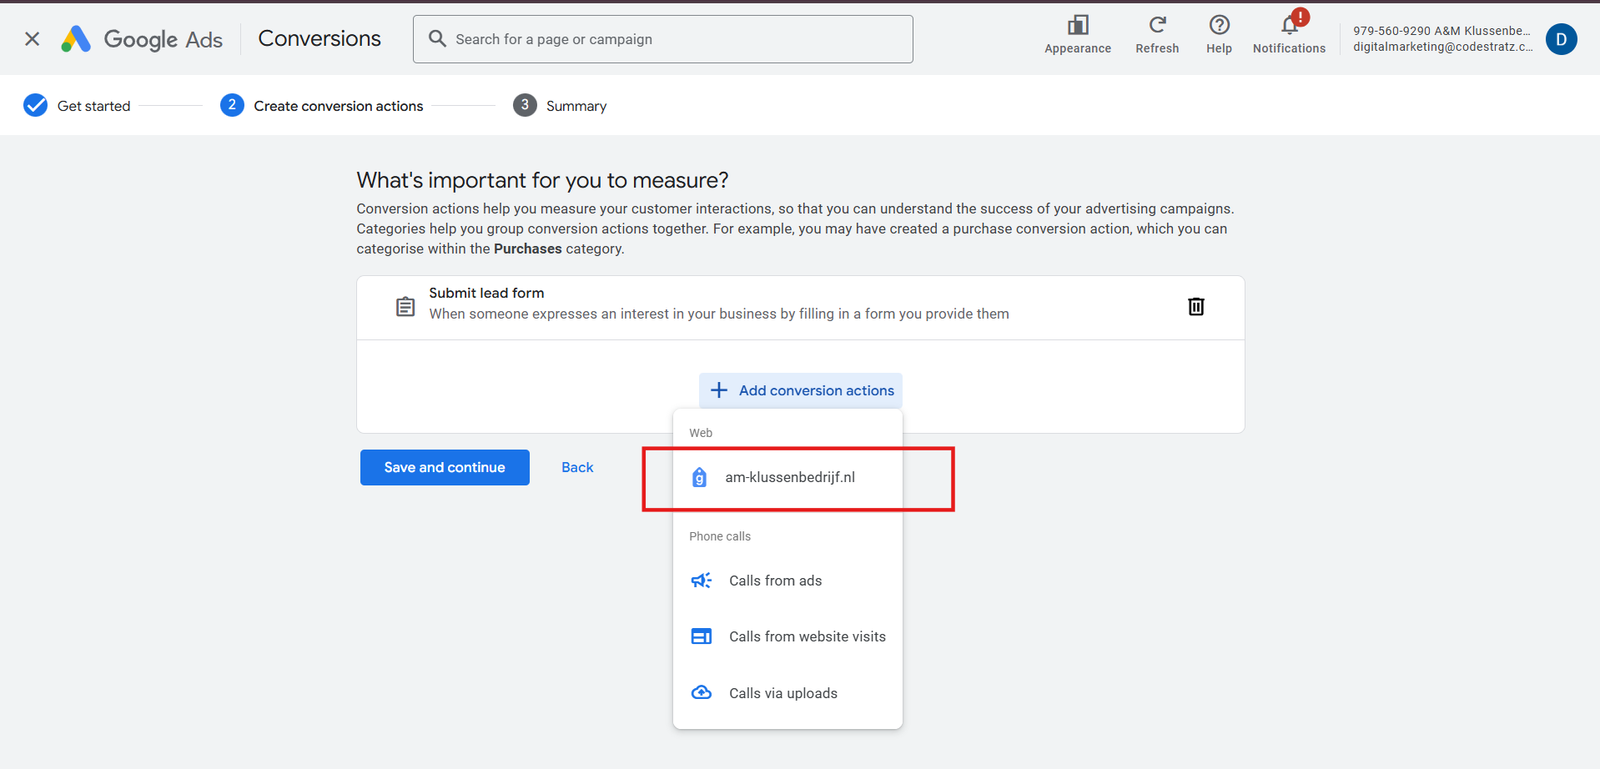
This ensures the conversion is linked to your verified website.
Step 7: Select Event to Measure the Submit Lead Form
Choose:
-
Enter URL where the conversion completed
-
Event type: Page load
-
Match when: URL contains
-
URL: Enter the unique part of the redirect URL (the page users reach after form submission)
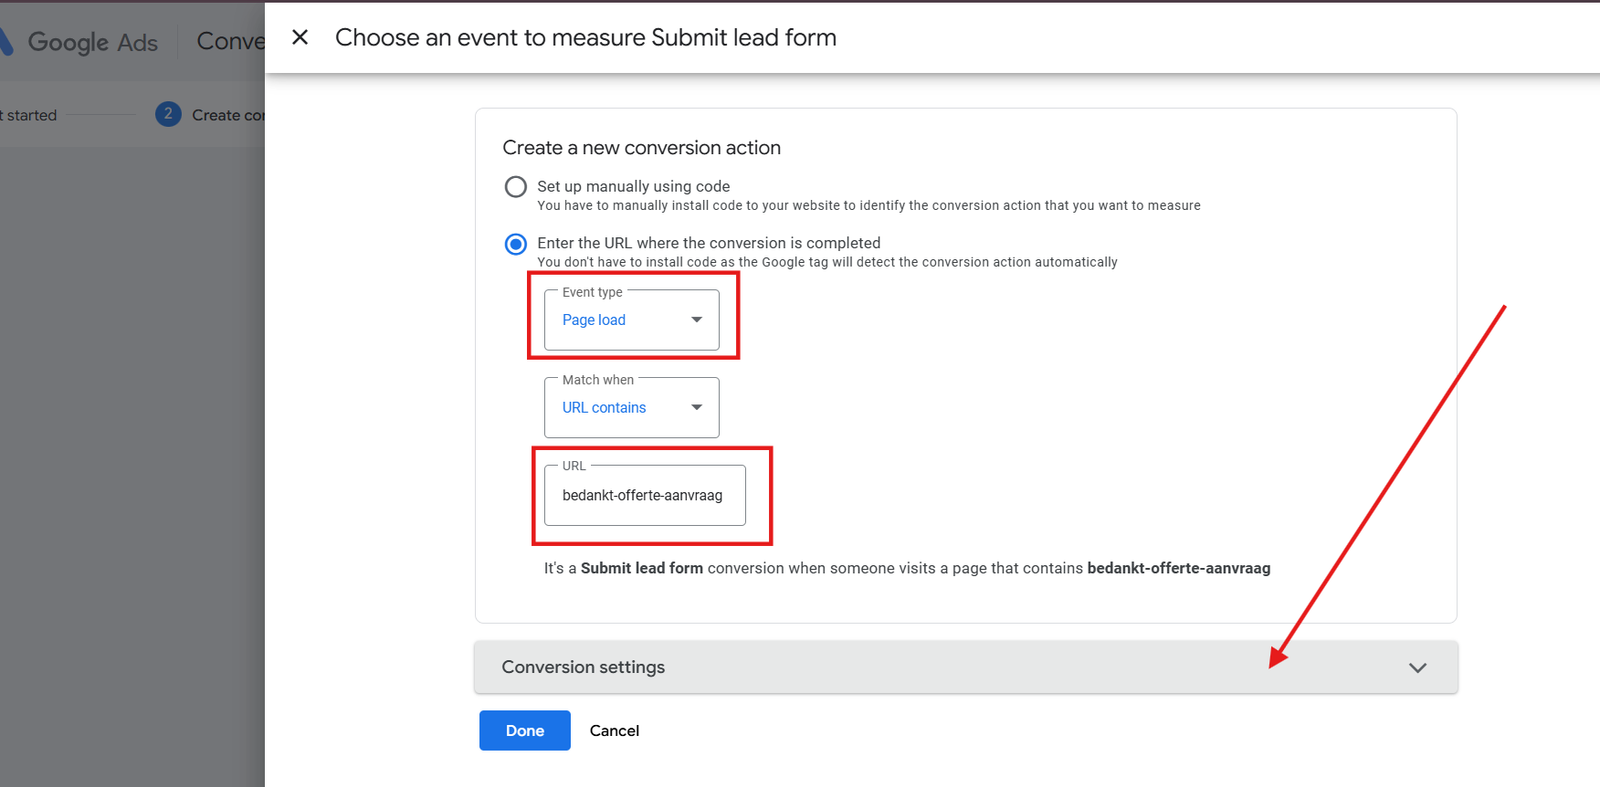
Then click Conversion Settings.
Step 8: Give Conversion Name
Provide a clear name such as:
Submit Lead Form – Redirect Page

This helps you recognise the conversion later.
Why Select “Primary Action Used for Bidding Optimisation”
Primary actions are used by Google Ads to optimise bidding.
Secondary actions are only recorded and not used for optimisation.
For leads, always choose Primary.
Step 9: Choose Value
Select Use the same value for each conversion, and enter 1 with your currency.
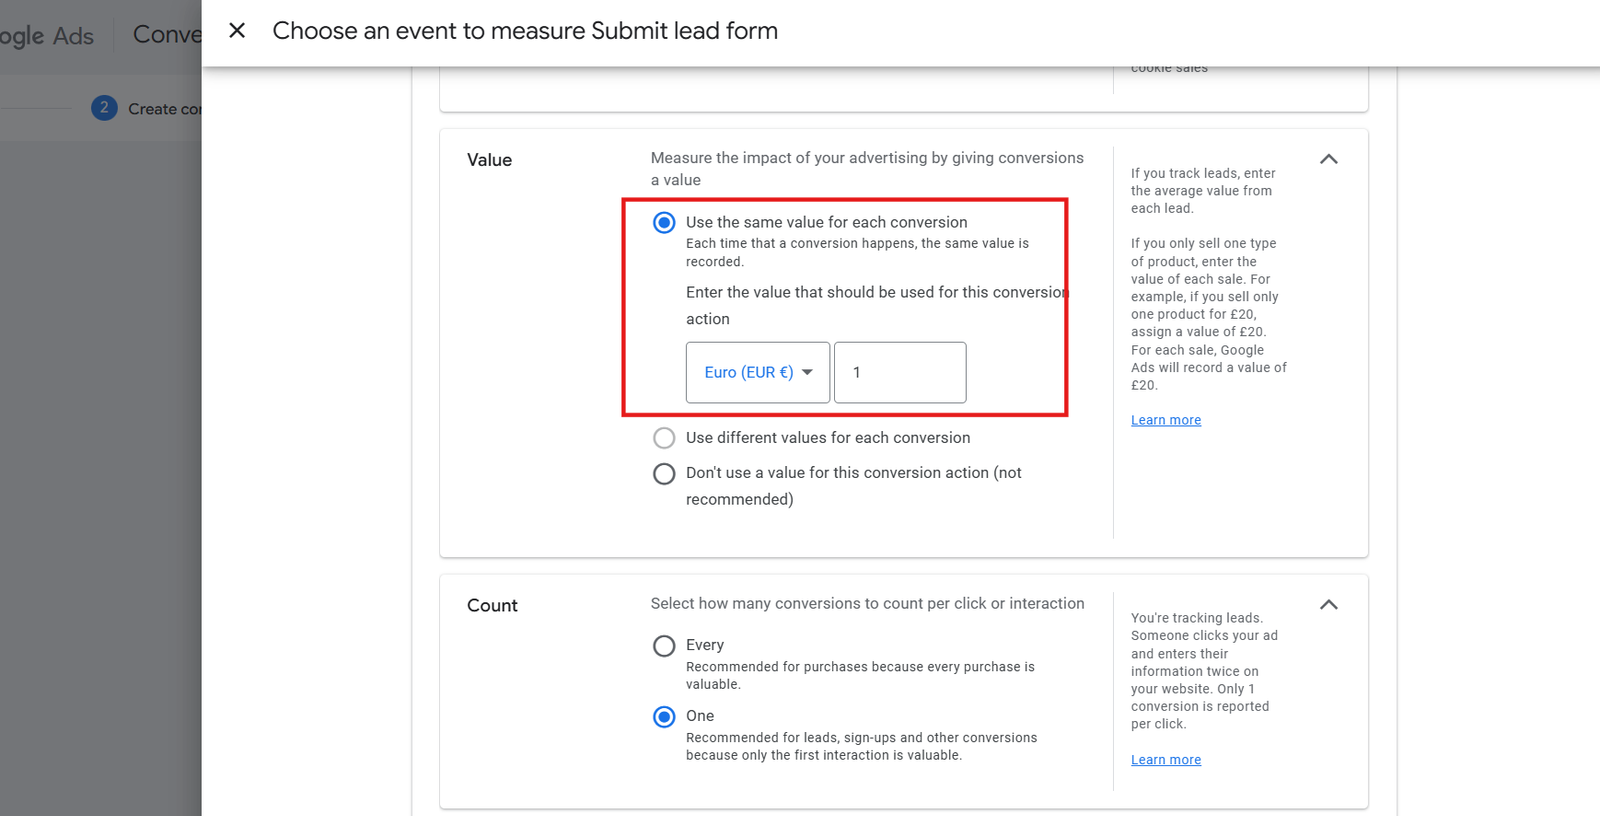
This standardises the measurement.
Why a Fixed Value Works for Lead Forms
Lead submissions do not carry monetary variation, so assigning a fixed value ensures Google Ads can measure and optimise these conversions consistently.
For sales or purchase events, dynamic values are used because the revenue amount changes for each transaction.
Why Not the Other Two Value Options?
-
Use different values for each conversion
- Requires dynamic value setup, not needed for basic form tracking.
-
Don’t use a value for this conversion
-
Not recommended because value-based bidding becomes weak.
-
Step 10: Select Count as “One”
Choose One.
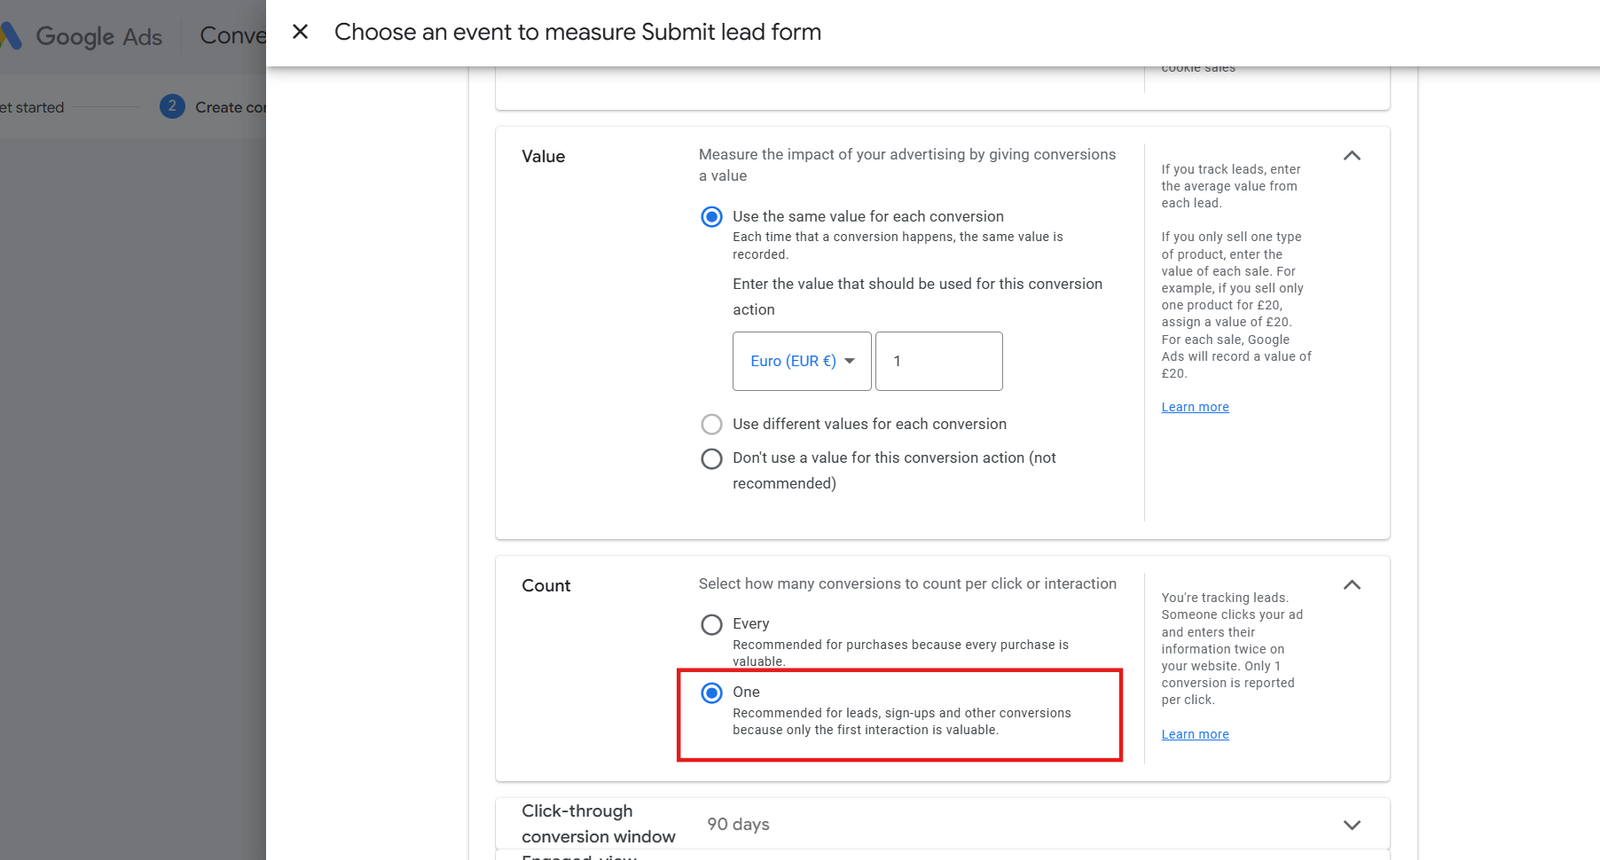
Because:
-
Lead forms should be counted once per user,
-
“Every” is suitable for purchases, not enquiries.
Step 11: Click Done After Reviewing All Settings
Make sure these settings are correct:
-
Click-through conversion window: 90 days
-
Engaged view conversion window: 3 days
-
View-through conversion window: 1 day
-
Attribution: Data-driven
-
Enhanced conversion: GTM
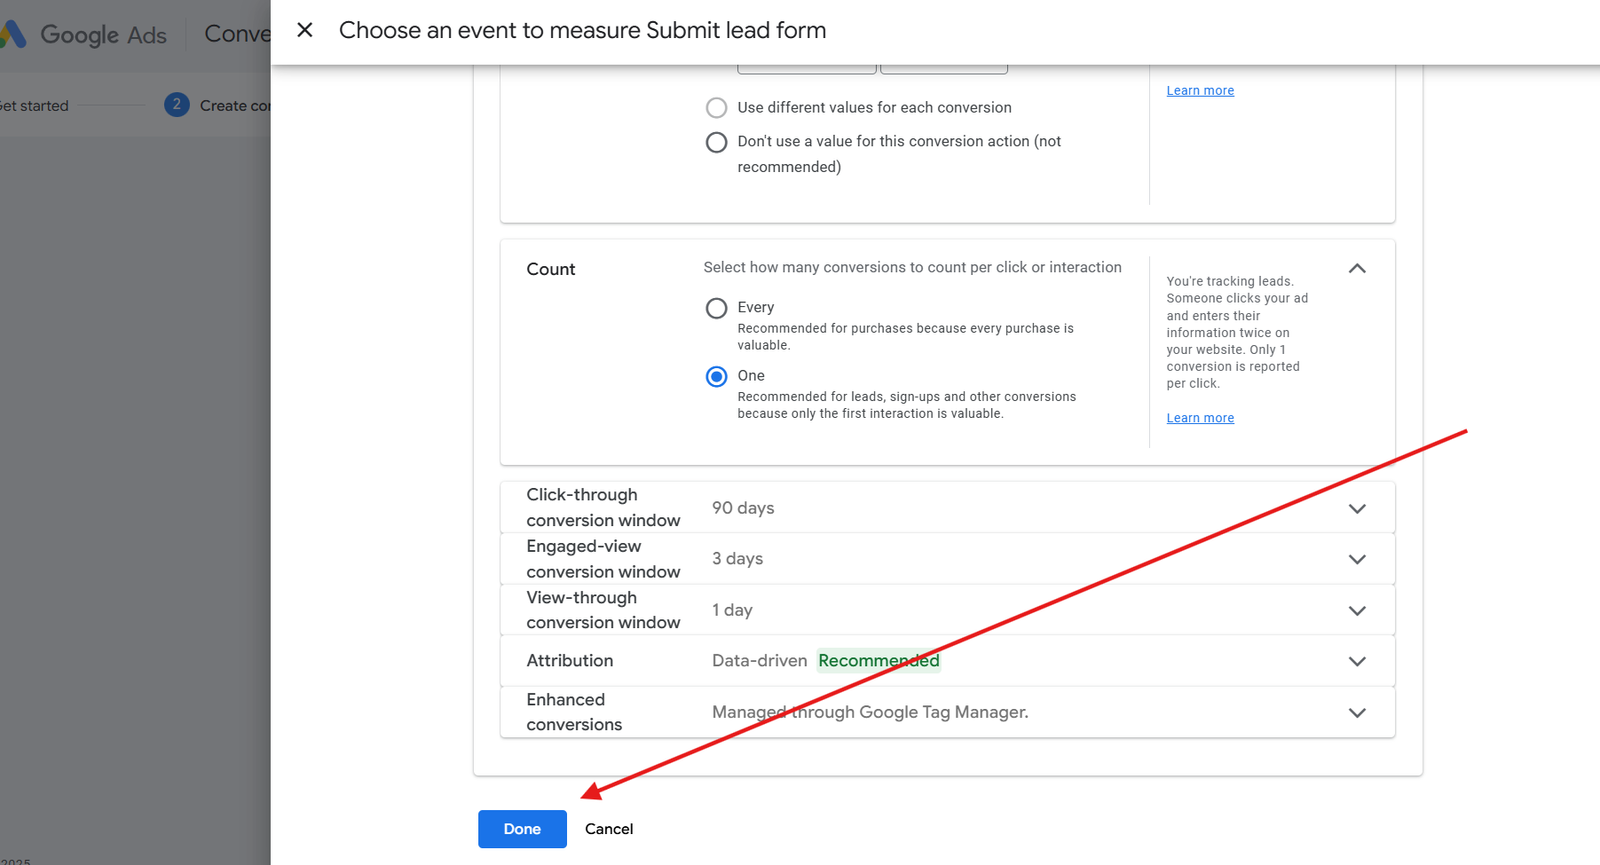
These are standard recommended settings.
Save the conversion action to complete the setup.

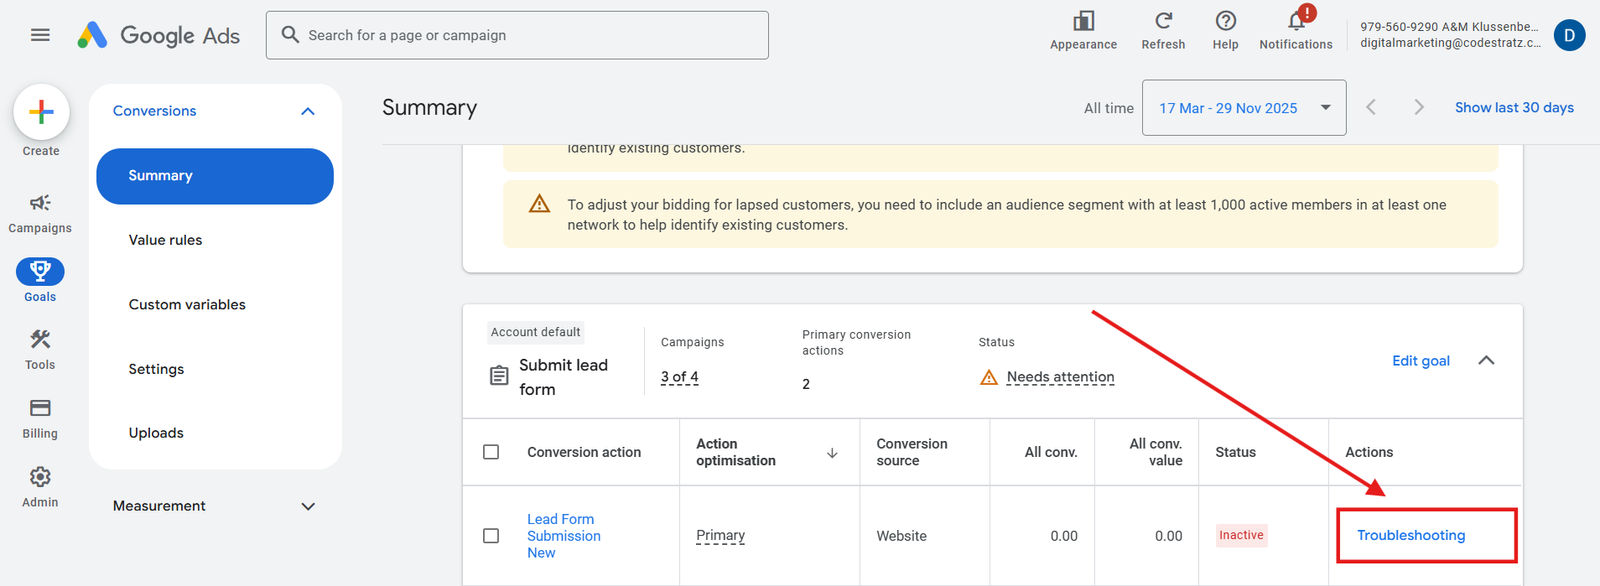
Step 12: Troubleshoot the Lead Form to Activate
Return to the Summary tab.
Find your conversion (Submit Lead Form).
It may show Needs Attention.
Click Troubleshoot.
Step 13: Test Your Conversion With Tag Assistant
Click Continue to connect Tag Assistant.
Tag Assistant helps you check whether the conversion is firing correctly.

Step 14: Give URL to Connect With Google Ads Tag Assistant
Enter your website URL in the field provided.

This loads your site with the debugger attached.
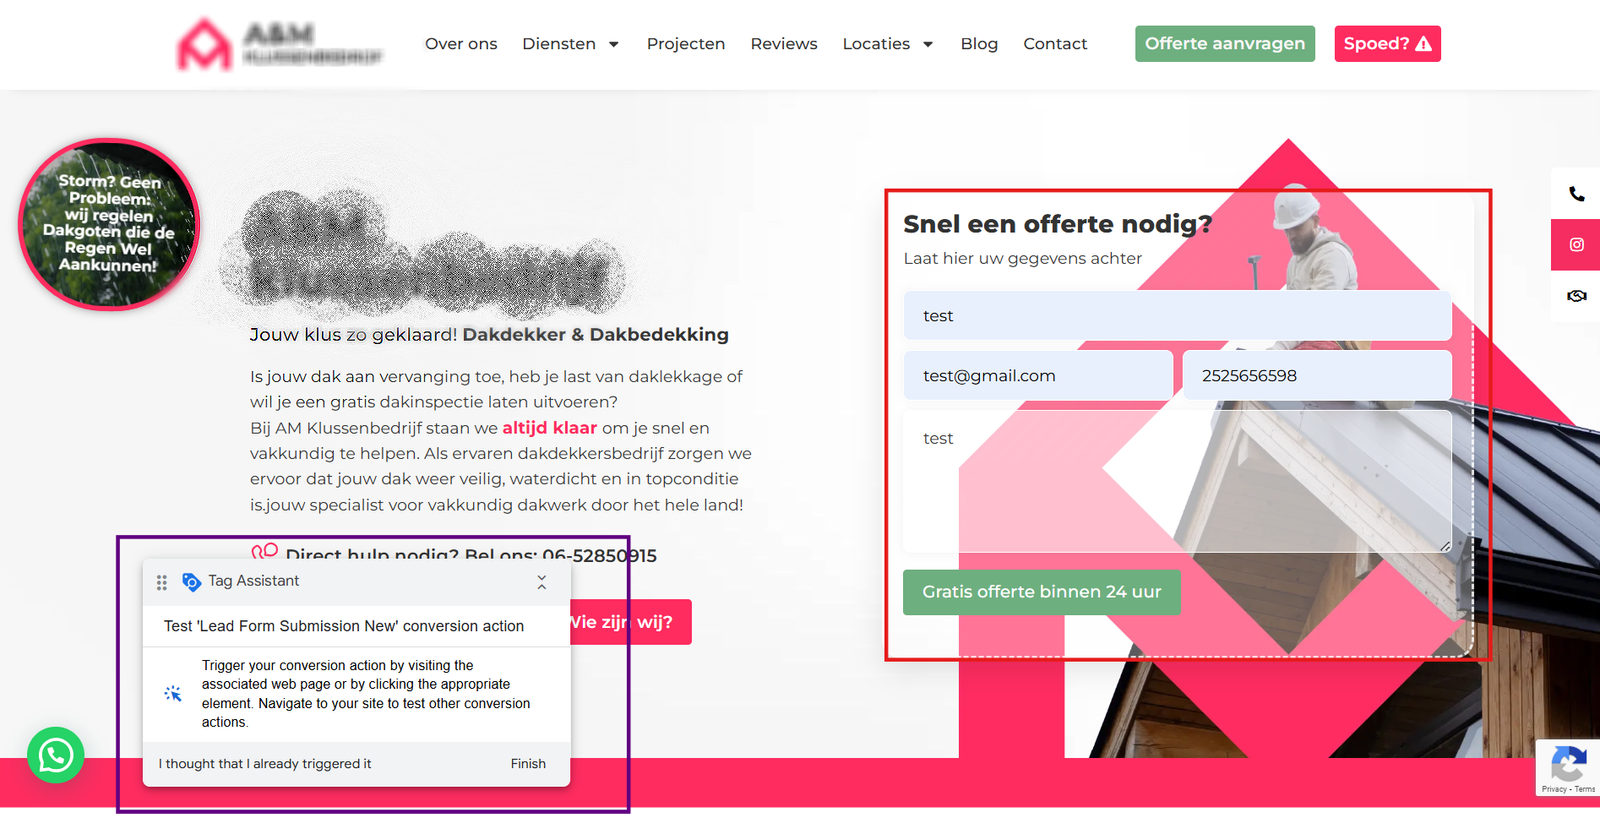
Step 15: Fill the Form that direct to other Page
Once the website is connected:
-
Go to the form
-
Fill it
-
Submit it
Tag Assistant will monitor the directed page.
Step 16: Confirm the Tag is Fired
If everything is correct, Tag Assistant will show:
“Submit Lead Form” conversion action is sending data
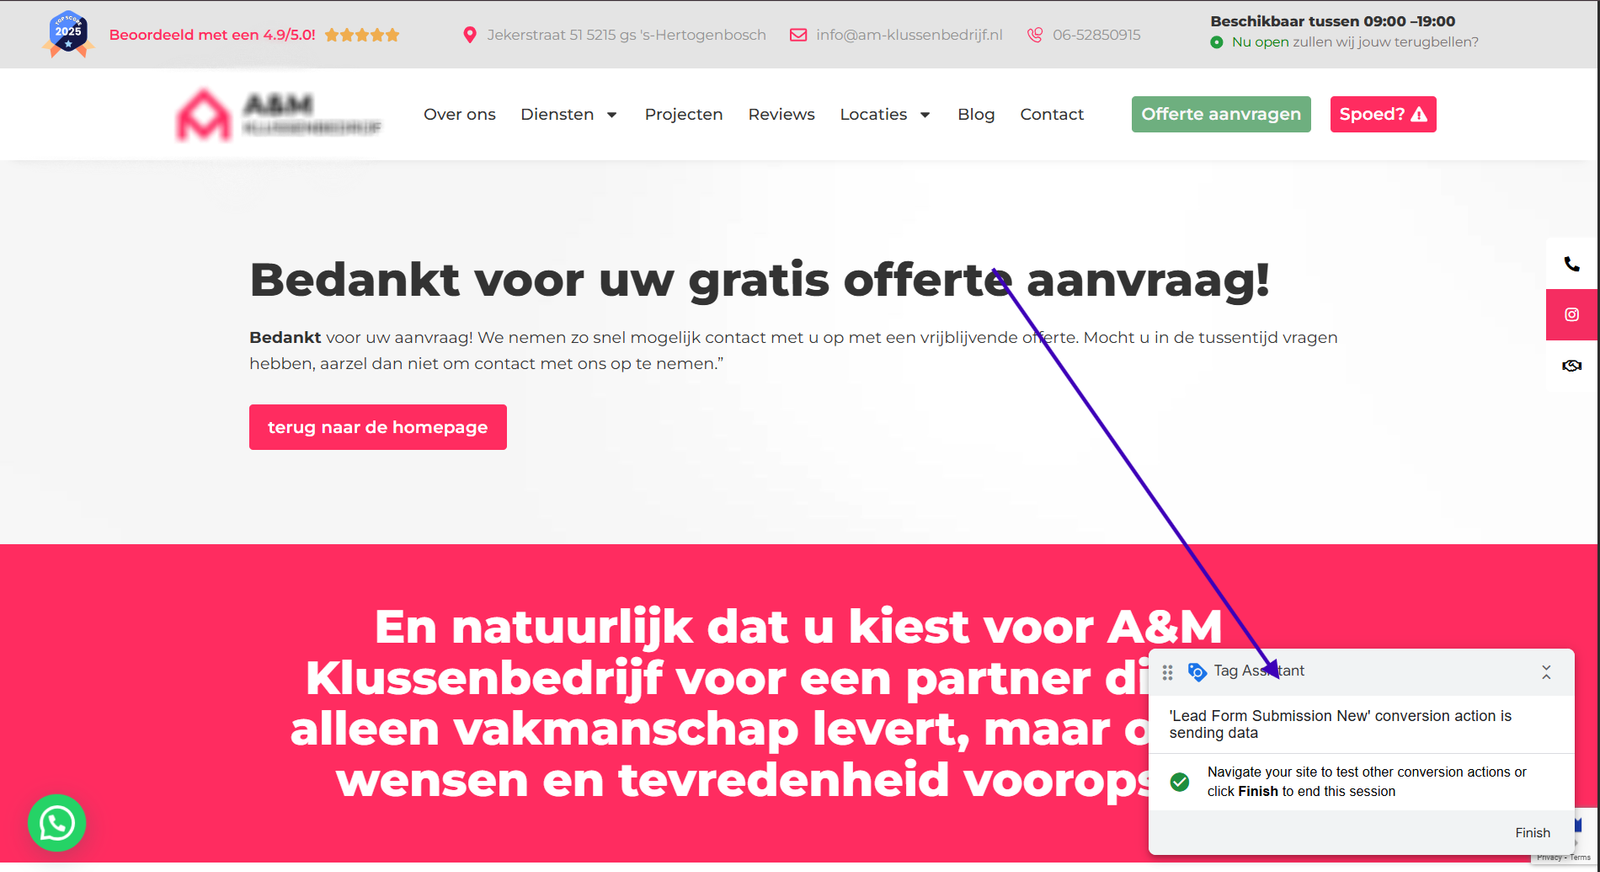
You will also see a green tick.
Click Finish.
Step 17: Look for an Success interface
A confirmation message will appear:
The conversion action is sending data to Google Ads
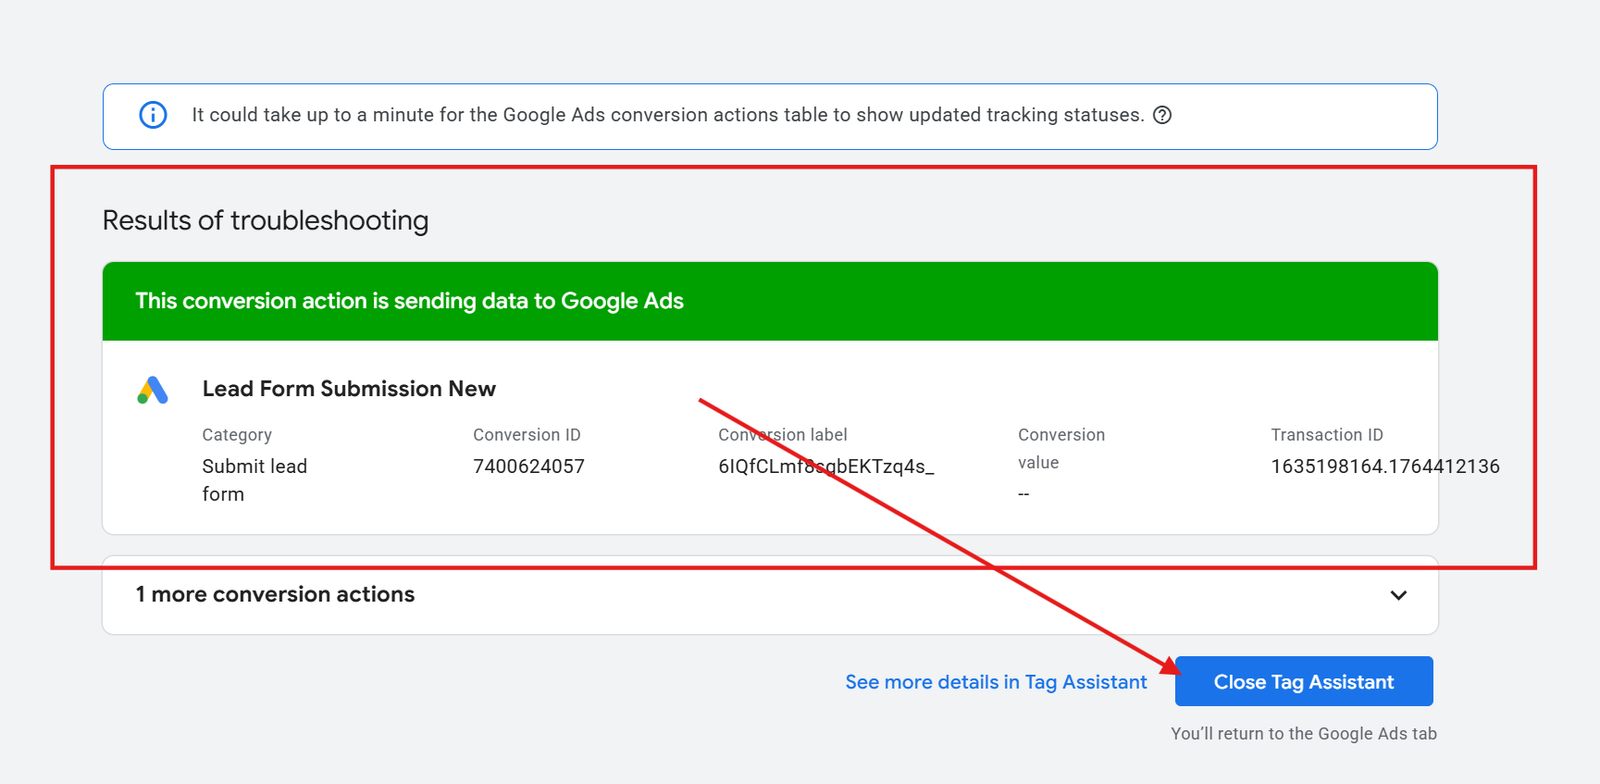
This means the tracking is working.
Step 18: After 24 Hours Check Again to Confirm It Is Active
Go back to the conversion summary after a day.
The status should now show Active.
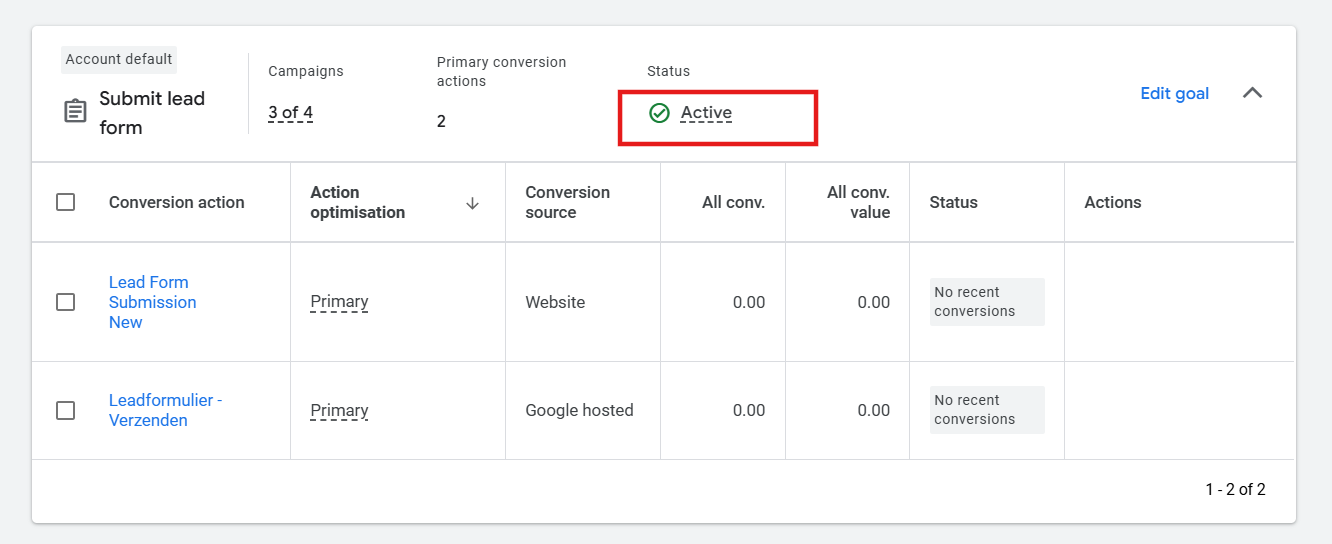
Why does Google Ads show “No recent conversions” ?
Because no users have yet come to your website through your Google Ads campaigns and completed a conversion action. Conversion data only appears when someone clicks your ad and then submits the form (or completes the defined conversion). Until your campaign generates traffic and at least one user converts, Google Ads will continue to show “No recent conversions.”
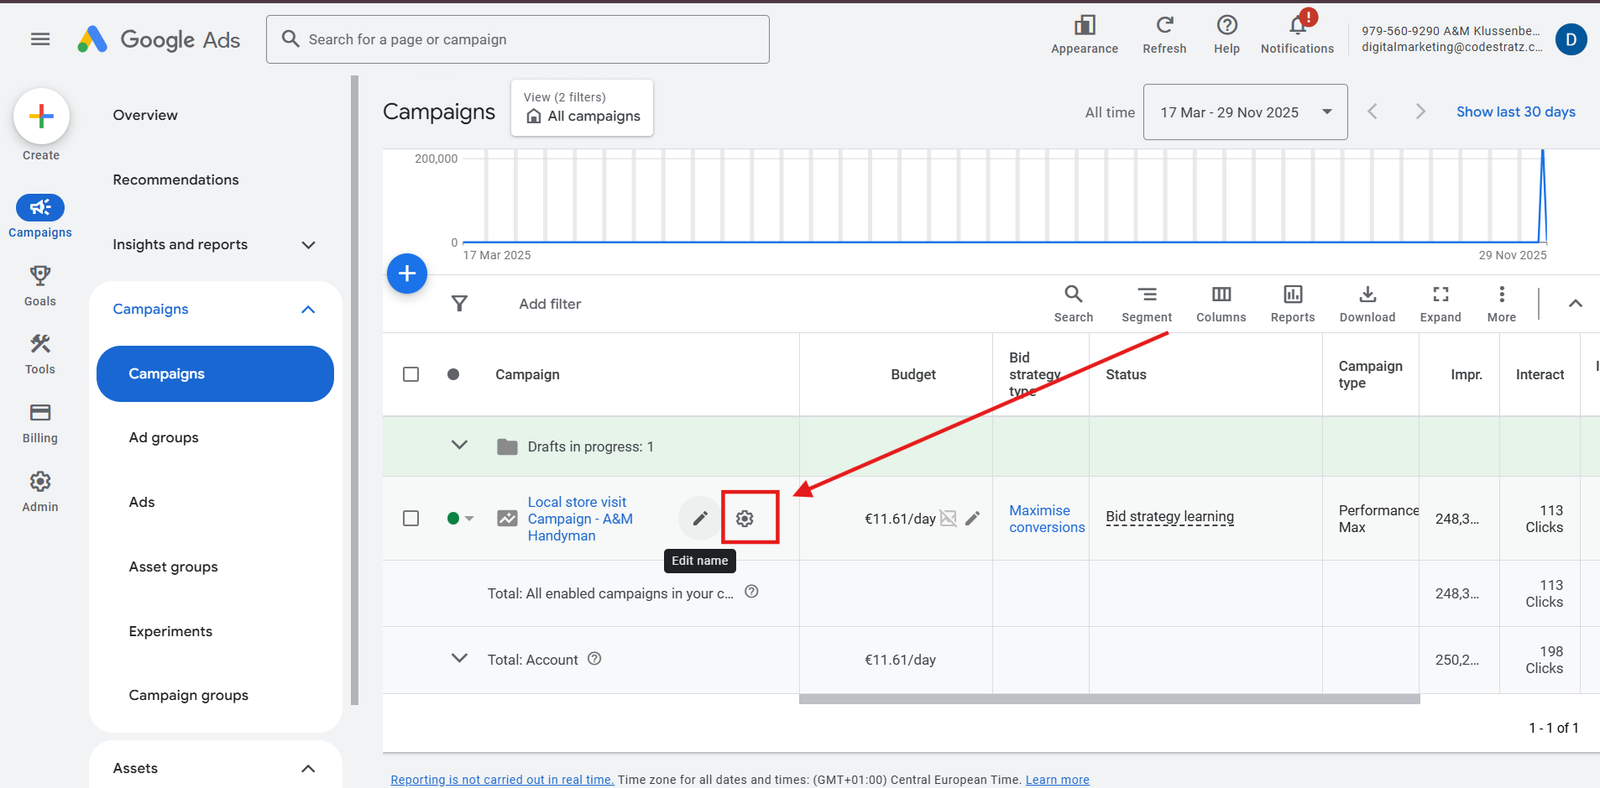
Step 19: Connect This Conversion With A Campaign Goal
Go to the campaign where you want to apply this conversion goal.
Open campaign settings.
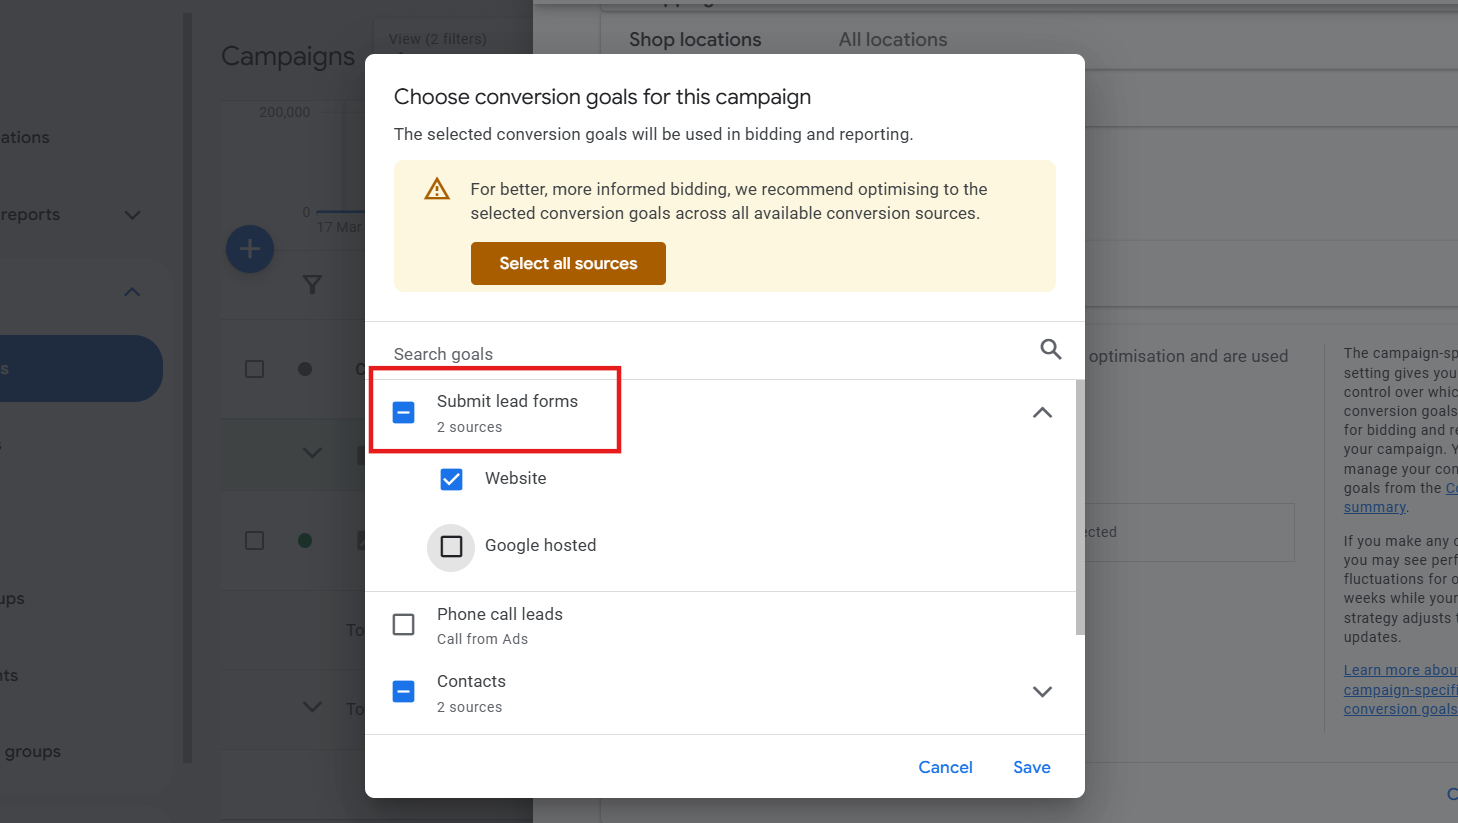
Step 20: Select the Conversion Goals
Click Change Conversion Goals.

Add or change the Campaign Goals with your Created Submit Lead Form Action
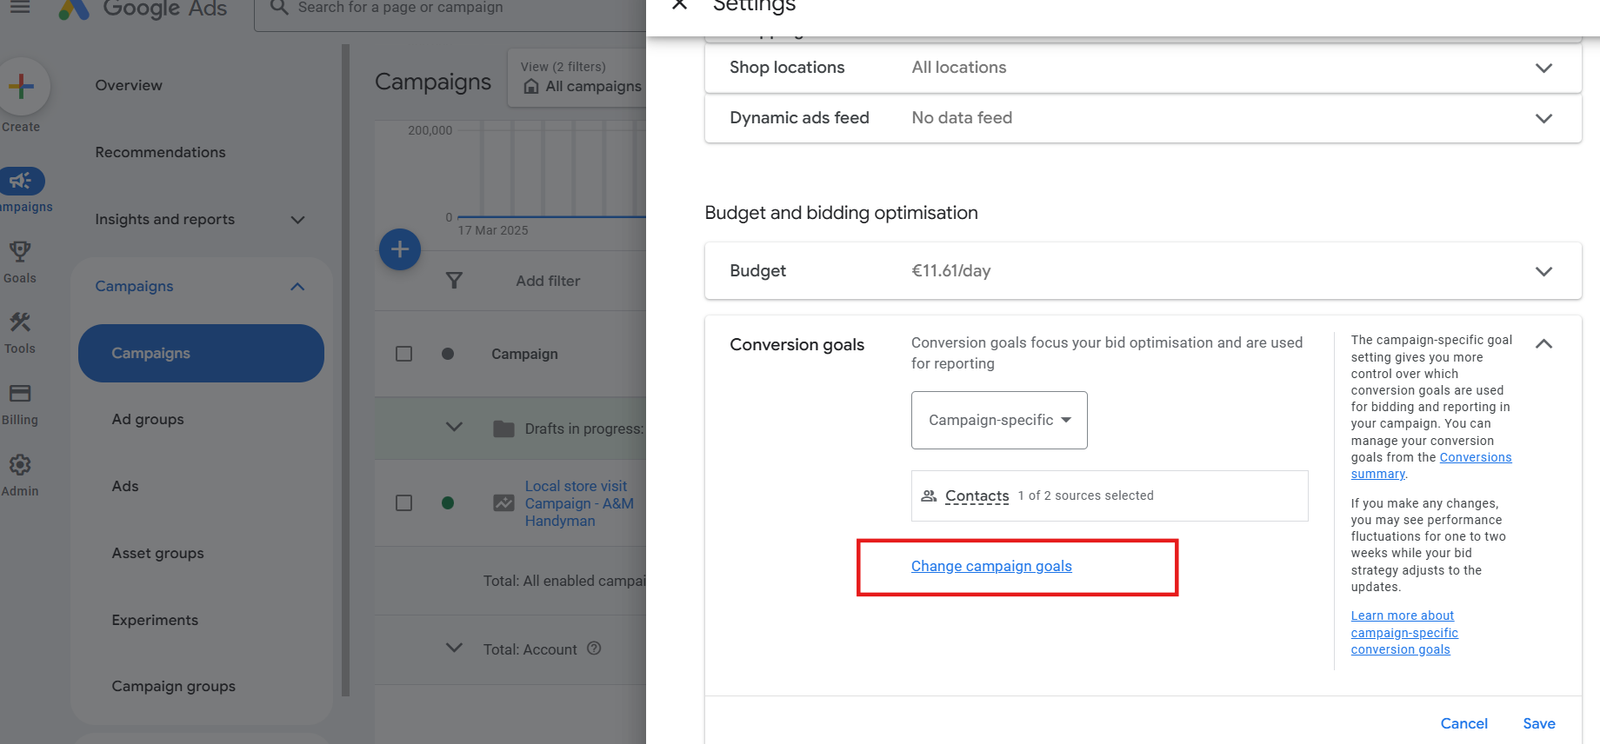
Select Submit Lead Form.
Ensure you choose the one under Website or Google-hosted.
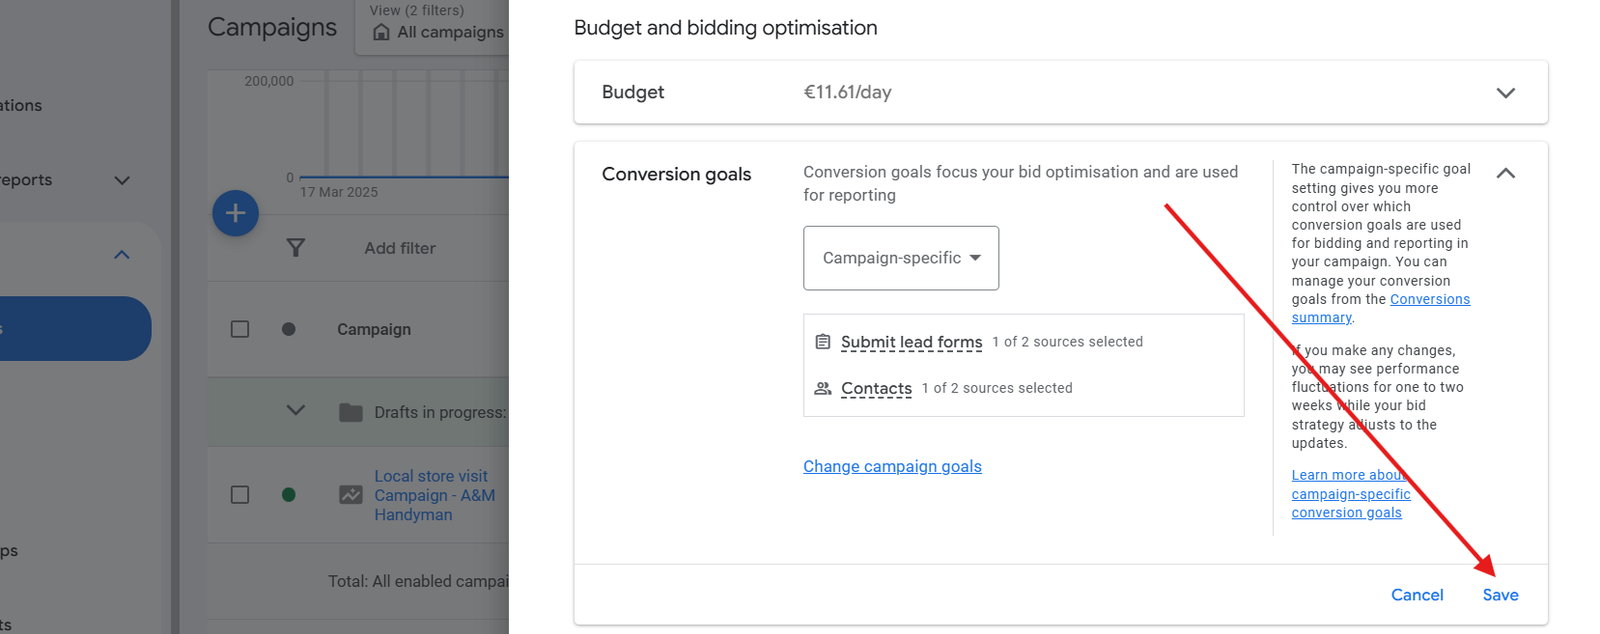
Step 21: Save This Conversion Goal
Your campaign is now linked to the correct conversion.
Find the Data in GA4
Once the tracking is complete, GA4 will also show the events under:
Reports → Engagement → Events
You can also mark it as a conversion in GA4 for better alignment.
Conclusion
Tracking form submissions that redirect to another page using Google Ads is straightforward when each step is followed correctly. This setup allows Google Ads to optimise your campaigns based on real enquiries, improve bidding accuracy, and measure the performance of your landing pages. With proper tracking, every click is measured, every lead is valued, and your ad spend becomes more meaningful.