
 Facebook
 Twitter
 Instagram
 YouTube
How To Track Form Submission Using Page View in a Website Using Google Tag Manager


Tracking form submissions is one of the most important actions in website analytics. It helps understand how effectively visitors engage with your forms and where they convert.
Using Google Tag Manager (GTM), you can easily track these form completions without altering your website code. This method using Page View tracking works best when users are redirected to a new page after form submission, such as a “Thank You” page.
Ensure GTM is Connected to Your Website
Before setting up any tracking, confirm that your GTM container is properly installed and linked to your website.
If GTM isn’t connected, no tag or trigger will fire.
To check:
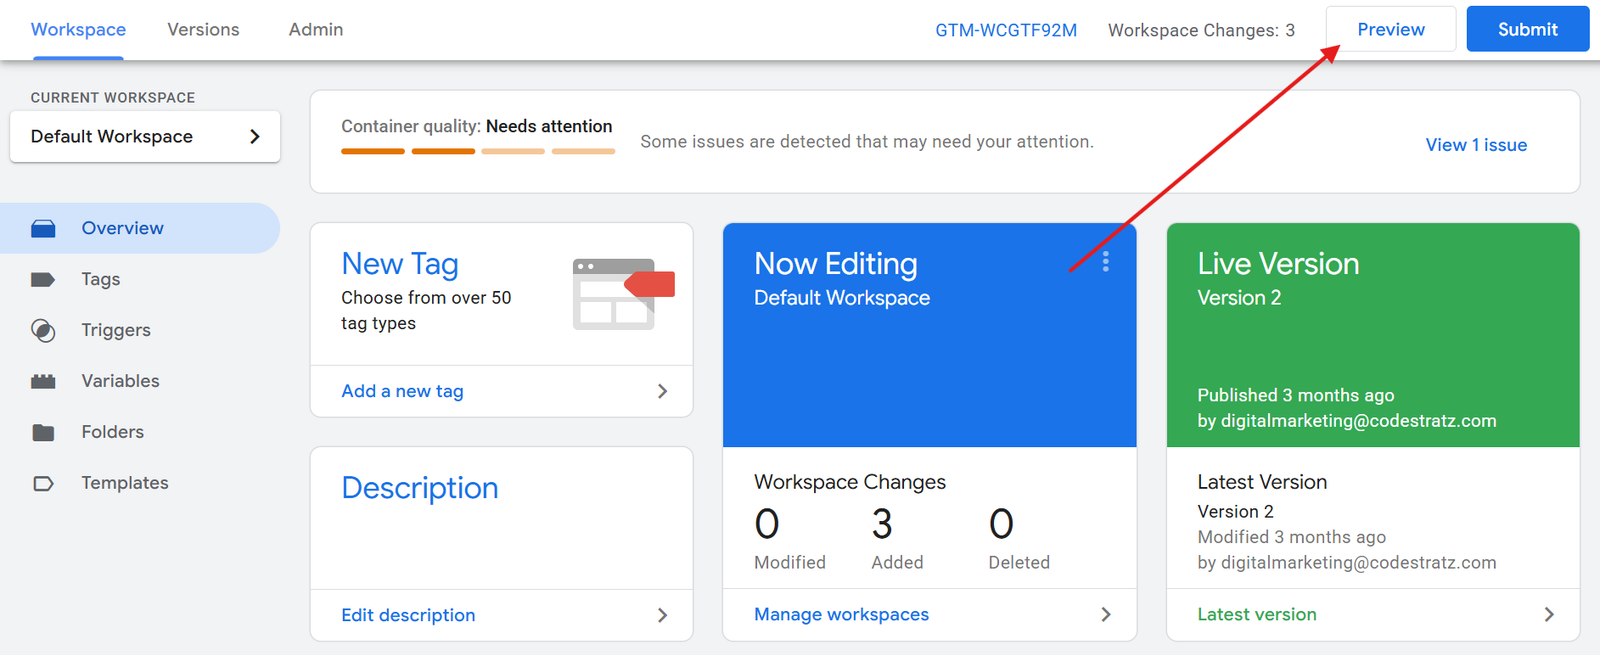
1. Open Preview mode in GTM.
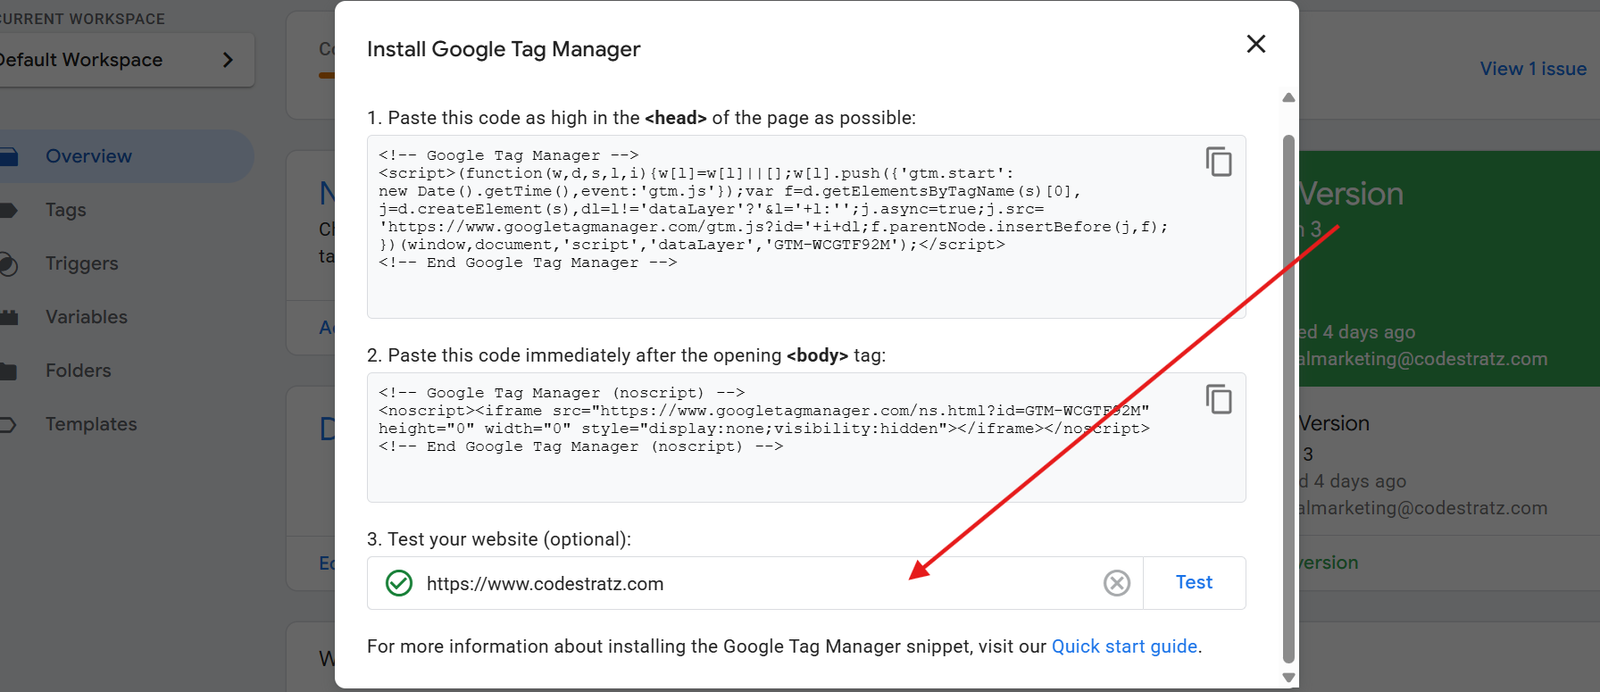
2. Enter your website URL.
3.Ensure a green “Connected” tick appears in Debug mode.
This confirms that GTM is correctly linked to your website and ready for tracking.
Learn How to Connect Google tag manager with Your Website
Two Ways to Track Form Submissions in GTM
There are two common ways to track form submissions using Google Tag Manager:
- Using Page View – When form submission redirects users to a separate page (for example, a “Thank You” or “Success” page).
- Using Element Visibility – When the form response message appears on the same page after submission.
In this guide, we’ll focus on the Page View method, which relies on the URL of the redirection page after form submission.
Learn How to Track Form Submission Using Element Visibility In GTM
Step 1: Track Form Submission Using Page View Trigger
Page View tracking works by monitoring when a visitor lands on a specific page after submitting a form. This is ideal for forms that redirect to a confirmation or thank-you page.
Step 1.1 : Analyse the Redirection URL Before Tracking

Step 1.2 : Start by visiting the form page on your website.
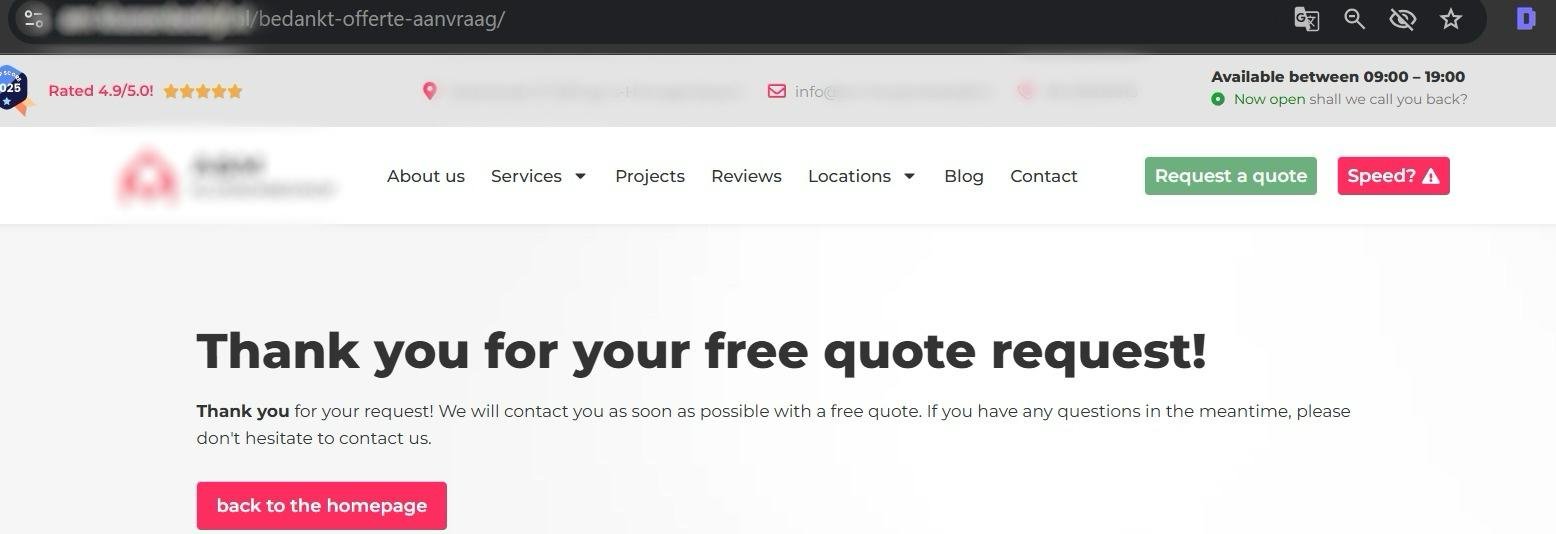
Now, submit the form and observe the URL you are redirected to.
For example: https://yourwebsite.com/thank-you/
Copy this redirected URL : this will be used as your condition inside GTM.
Step 2: Create a Trigger in GTM
Once you have the redirected page URL, it’s time to create a trigger that fires when someone lands on that page.
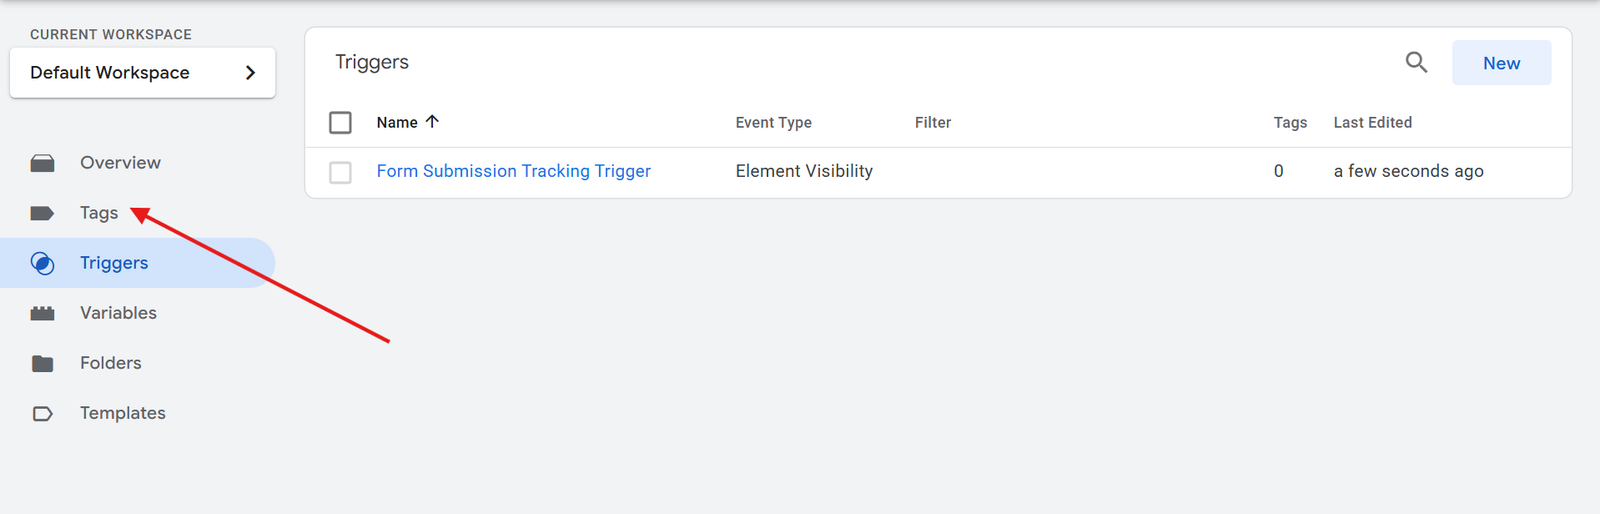
Step 2.1 : Open the Trigger Section in GTM
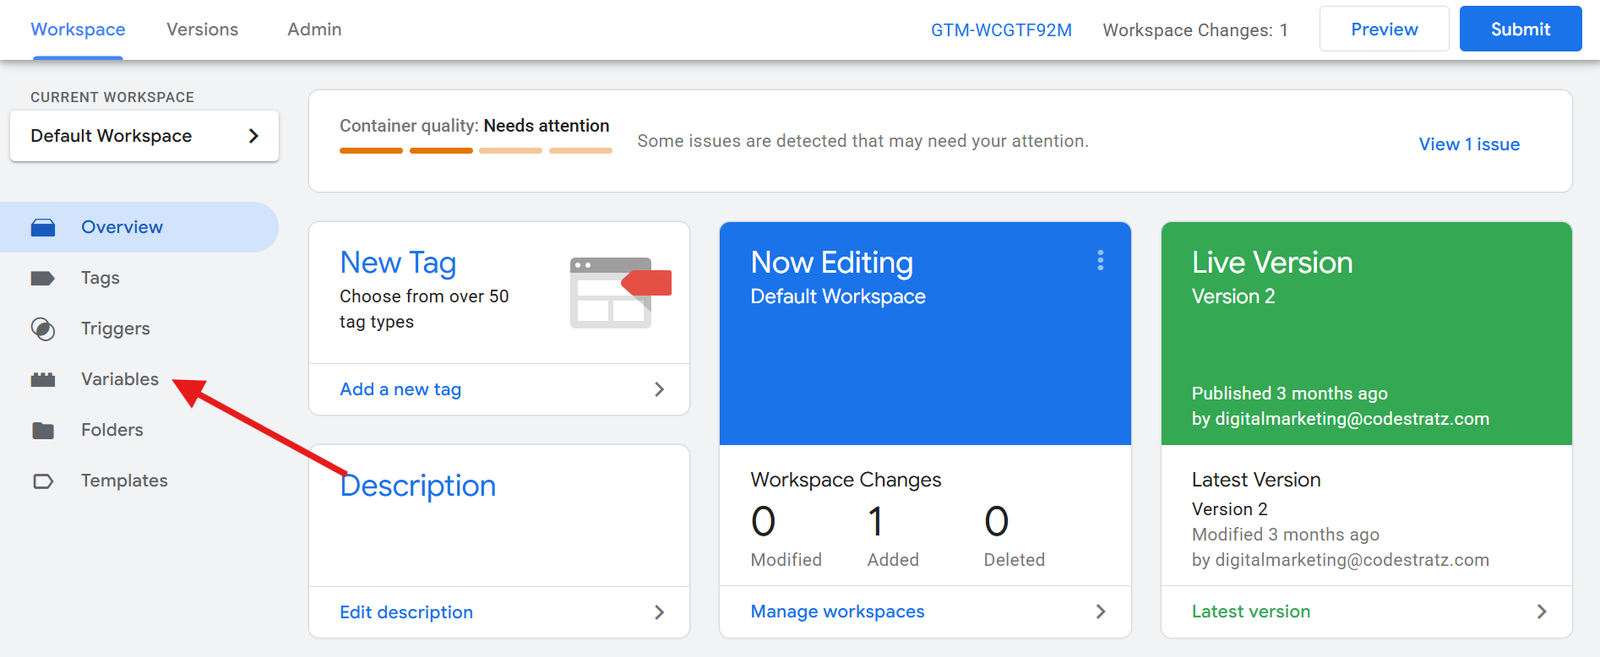
In your GTM workspace, click Triggers in the left sidebar.
Step 2.2 : Create a New Trigger
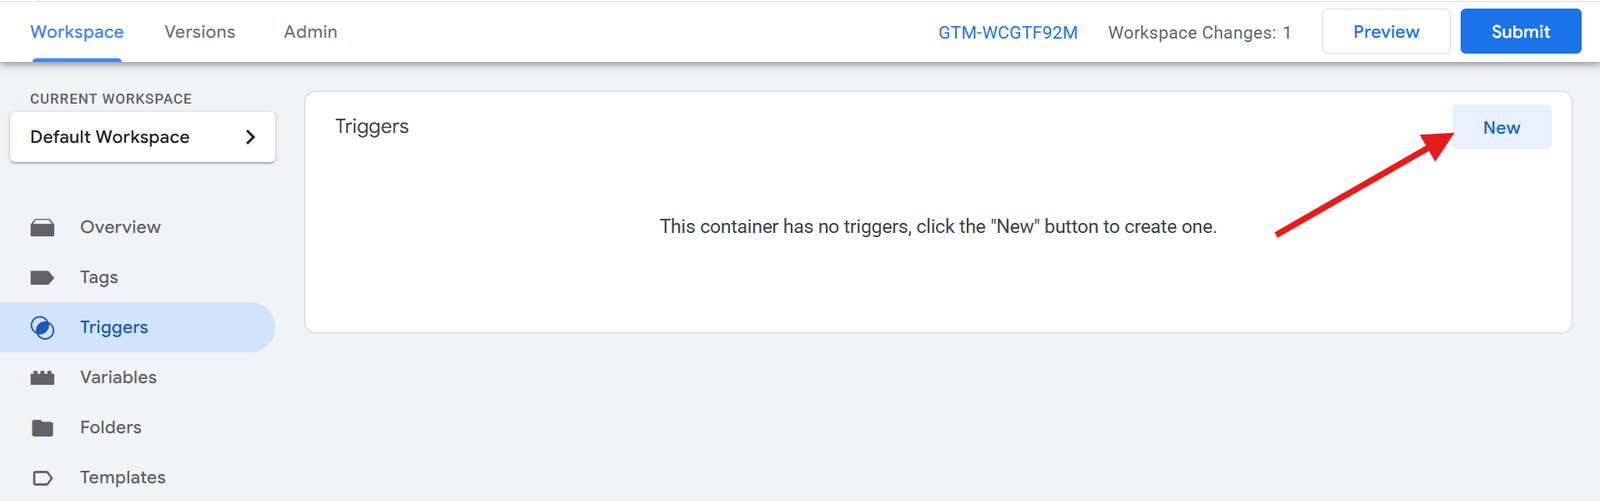
Click New to begin creating your trigger.
Step 2.3 : Select “Page View” as Trigger Type
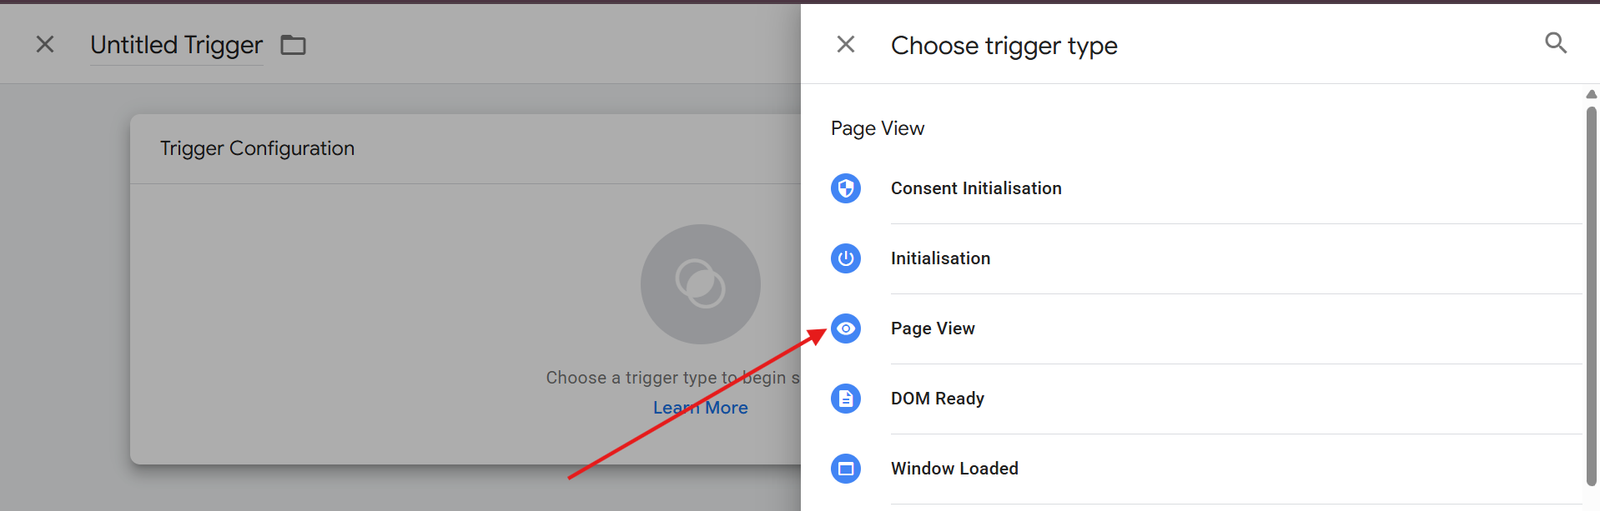
Click on the Trigger Configuration box and select Page View from the list of available trigger types.
Step 2.4 : Name the Trigger and Choose “Some Page Views”
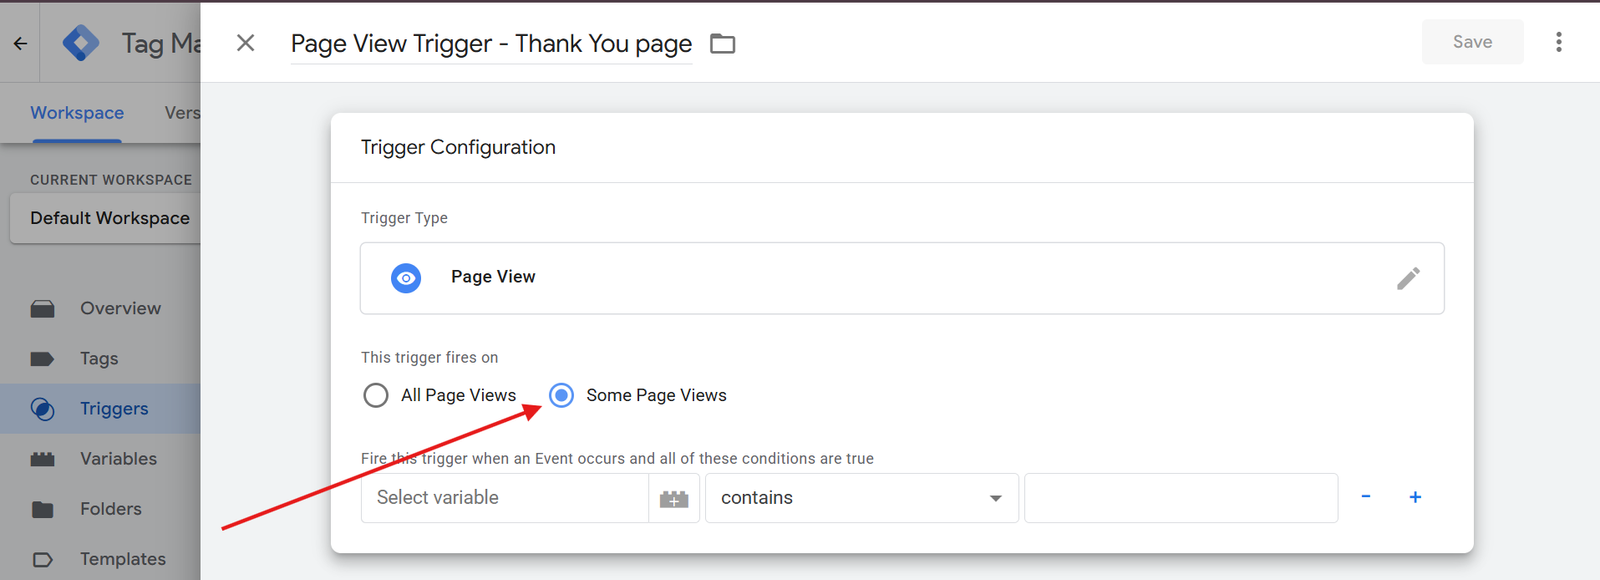
Give your trigger a meaningful name
For example : Form Submission – Thank You Page View
Under firing options, select Some Page Views.
Why “Some Page Views”?
Because you want the trigger to fire only on a specific page (the thank-you page), not on every page of the website.
Choosing “All Page Views” would cause it to fire across the entire site, which is not accurate for form tracking.
Step 2.5 : Select “Page URL” as the Variable
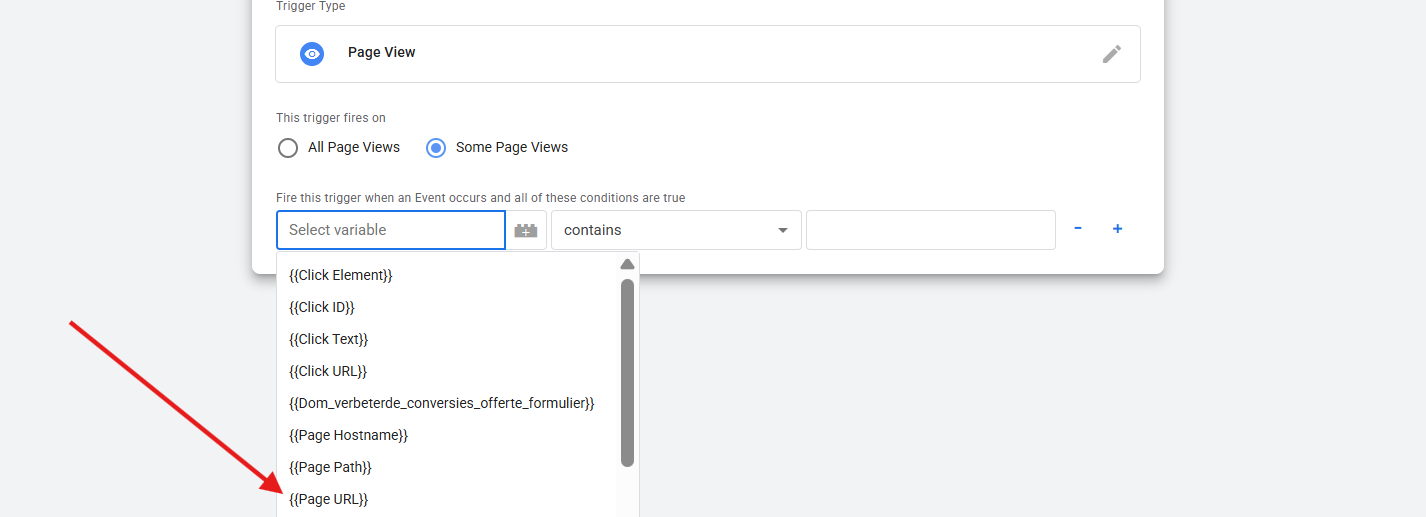
From the variable dropdown, choose Page URL.
Why Page URL?
Because GTM identifies the page the user is currently on by reading its URL — perfect for detecting the redirection page after form submission.
Step 2.6 : Select “Equals” as the Condition
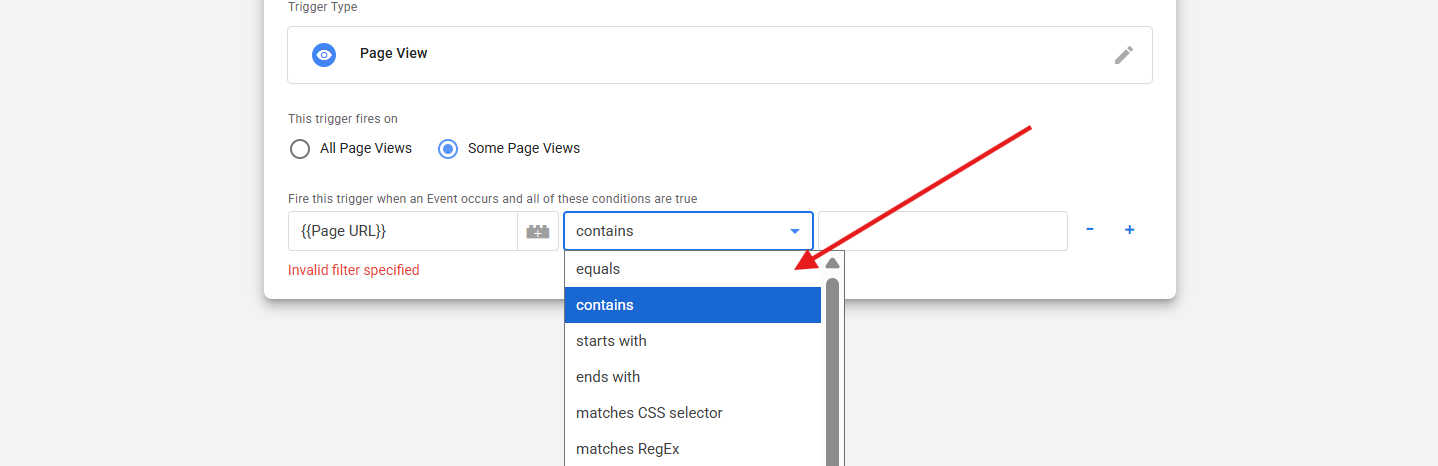
In the condition field, choose Equals.
Why Equals?
It ensures the trigger only fires when the page URL exactly matches the specified thank-you page URL.Other conditions, such as “Contains” or “Starts with”, can lead to false triggers if multiple URLs contain similar paths.
Step 2.7 : Paste the Redirection Page URL
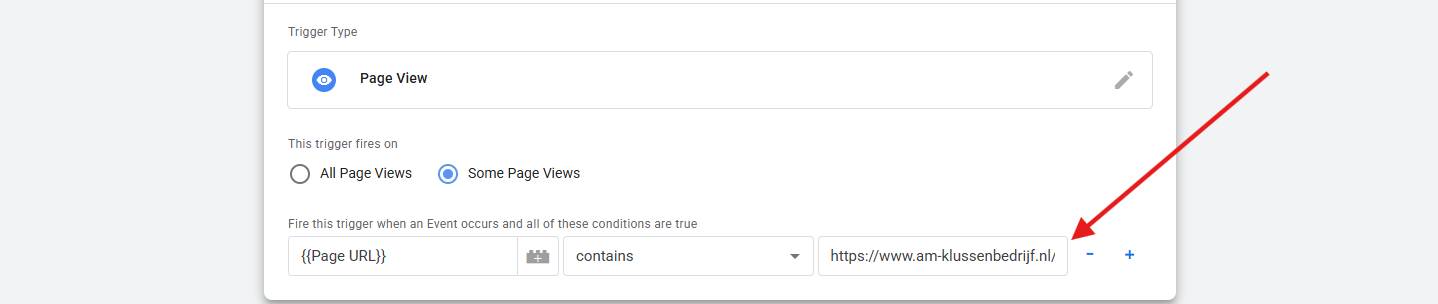
Paste the Thank You page URL,that appears after a form submission, such as:
Example : https://yourwebsite.com/thank-you/
This tells GTM to fire the trigger only when someone reaches that specific URL.
Finally, click to store your trigger
Step 3: Create a GA4 Tag for Form Submission Tracking
Now, you’ll create a Google Analytics 4 (GA4) tag to send the form submission event data when this trigger fires.
Give the Tag a Clear Name

Create a descriptive tag name, such as GA4 Event – Form Submission Trigger
This makes it easy to identify later among other tags.
Step 3.1 : Select “GA4 Event” as Tag Type

In Tag Configuration, choose Google Analytics: GA4 Event.

Why GA4 Event?
It allows you to send a specific event (form submission) to your GA4 property, helping you track conversion activity directly in Analytics.
Step 3.2: Enter Measurement ID and Event Name
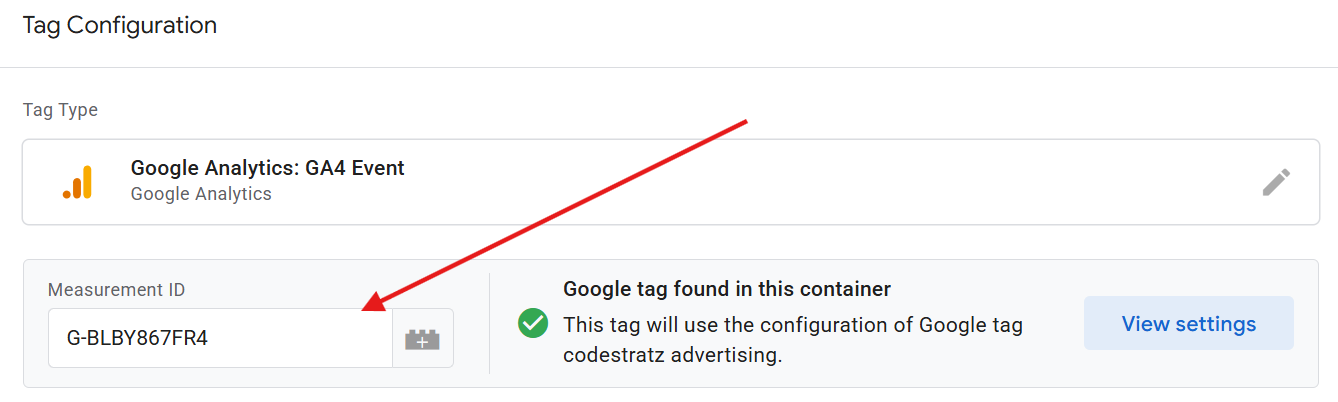
Measurement ID: Paste the ID from your GA4 property.
Make Sure The Tag is found In the Container is a “ green tick“
Event Name: Enter a clear, lowercase name such as form_submission.
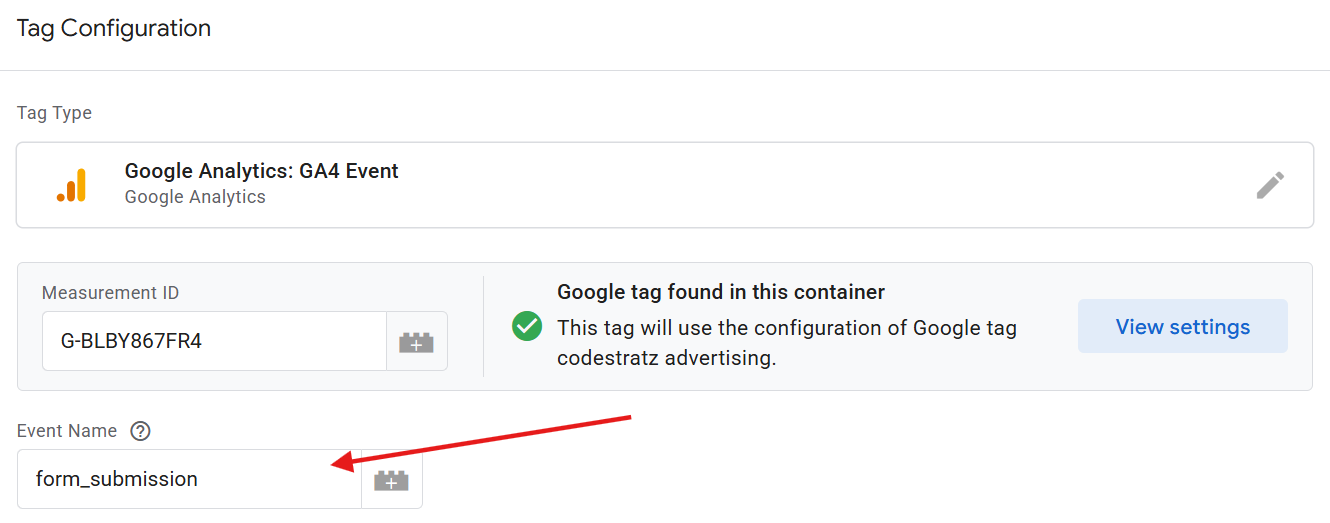
This naming format helps maintain uniform event tracking in reports.
Step 3.3 : Connect the Tag with the Trigger
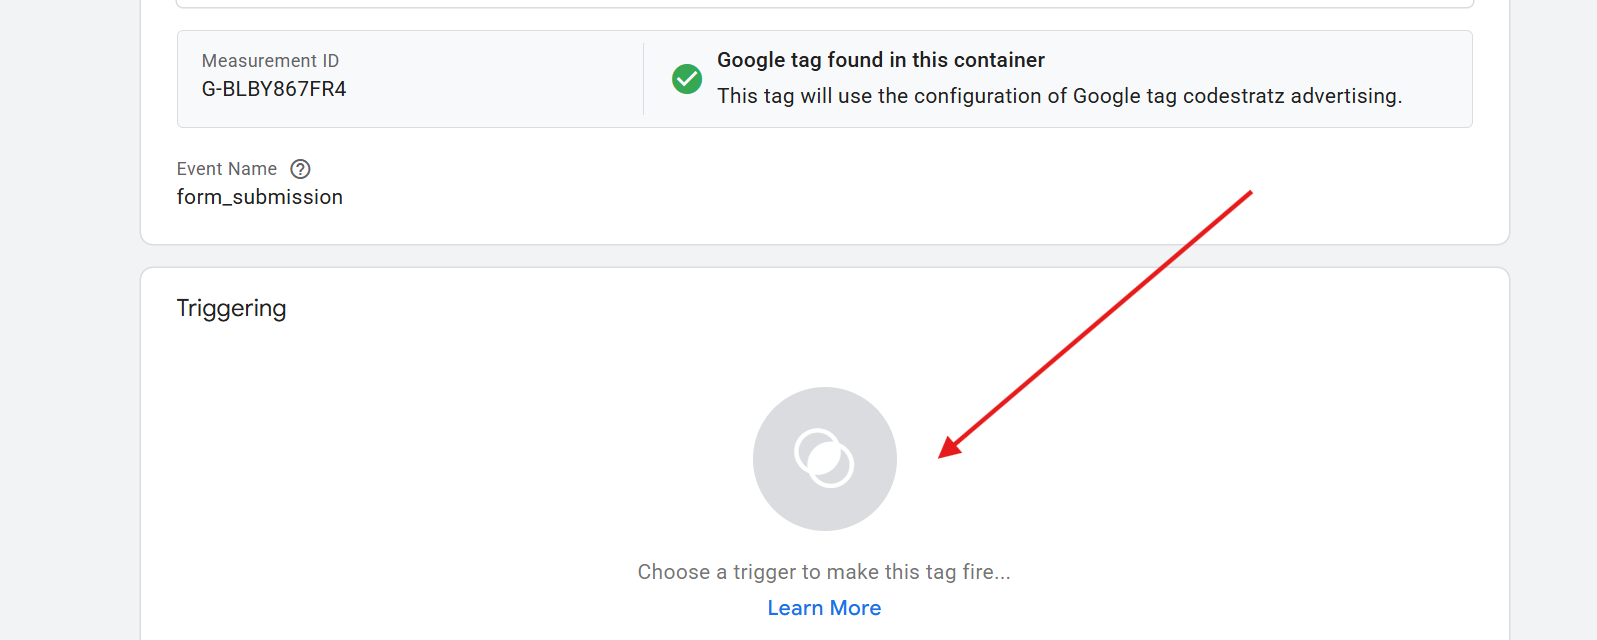
Under Triggering, select the trigger you created earlier
Page View Trigger – Thankyou Page

Then click Save to confirm.
Step 4: Test the Setup in Preview Mode
Testing ensures your configuration is working correctly before publishing.
Enter Preview Mode in GTM
Click Preview at the top right of GTM. This will open Tag Assistant in a new window.
Step 4.1 Connect GTM to Your Website
Enter your website’s URL and click Connect.
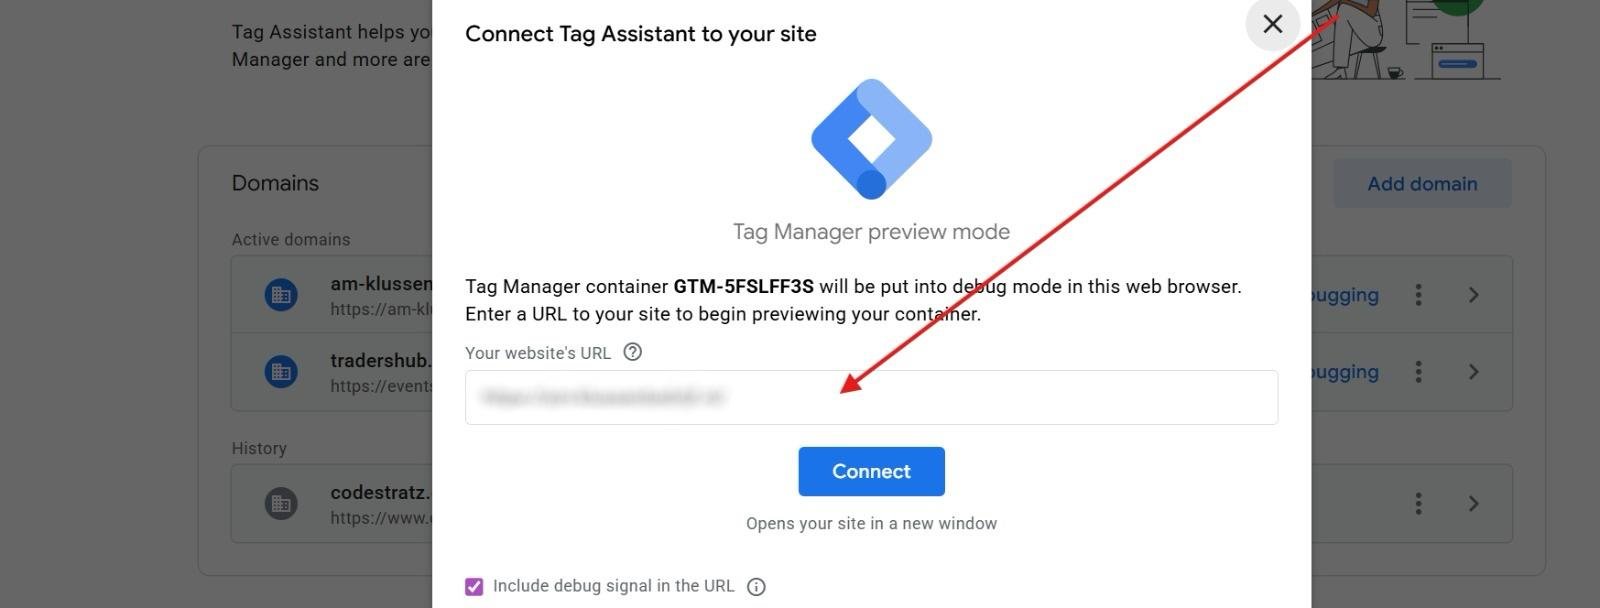
This opens your website in Debug mode, allowing GTM to monitor tag firing in real time.
Step 4.2 : Verify Website Connection in Debug View

Once connected, you’ll see a green tick beside your domain name in Tag Assistant.
This confirms that GTM is actively monitoring your website.
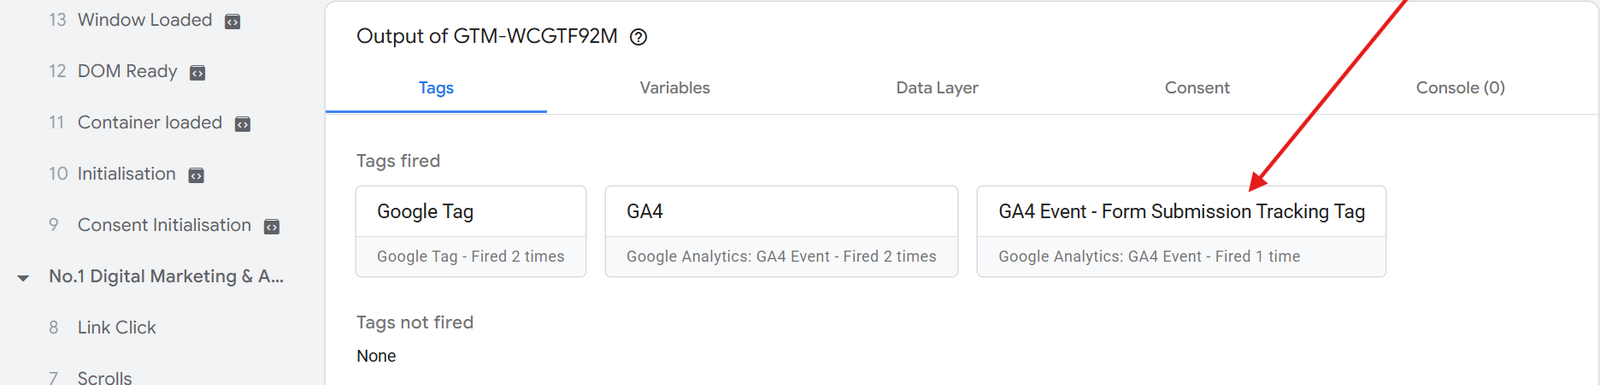
Step 4.3 : Submit the Form and Check if Tag Fires
Now, go to your website and submit the form.
If set up correctly, the GA4 event tag should fire in the Tag Assistant’s preview panel.
Step 4.4 : Verify Data in GA4 DebugView
Open Google Analytics 4 → Admin → DebugView and check if the event form_submission appears.
If it does, the data is successfully passing from GTM to GA4.
Step 4.5 : Submit & Publish The Tag
Once you’ve confirmed that the event is tracking correctly in GA4 DebugView, it’s time to publish your changes in Google Tag Manager.
Click “Submit” in GTM

At the top-right corner of your GTM workspace, click Submit.
This opens the Submit Changes window, where you finalise and publish your configuration.
Step 4.6 : Provide Version Name, Description To Submit
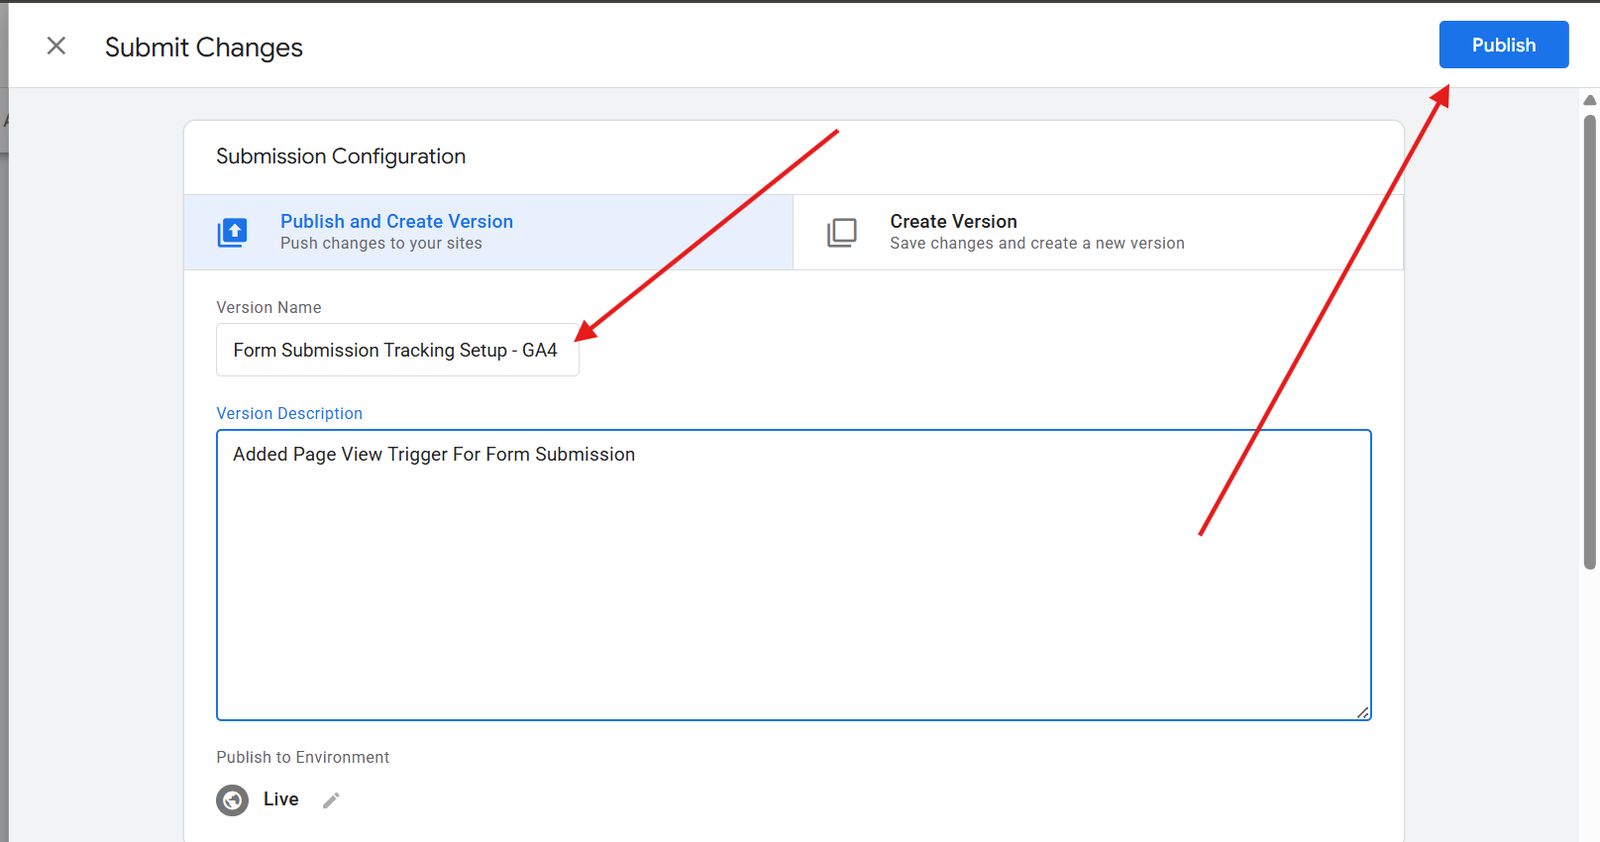
Provide a clear Version Name, such as:
- Form Submission Tracking Setup – GA4
In the Description, briefly note what you added for example:
- “ Added Page View trigger and GA4 event tag for form submission tracking”
This helps you and your team identify what changes were made if you revisit this version later.
Step 4.7 : Click “Publish” to Make It Live
Click Publish to make your tag live on the website.
Once published, GTM will start tracking real user form submissions immediately ; not just in preview mode.
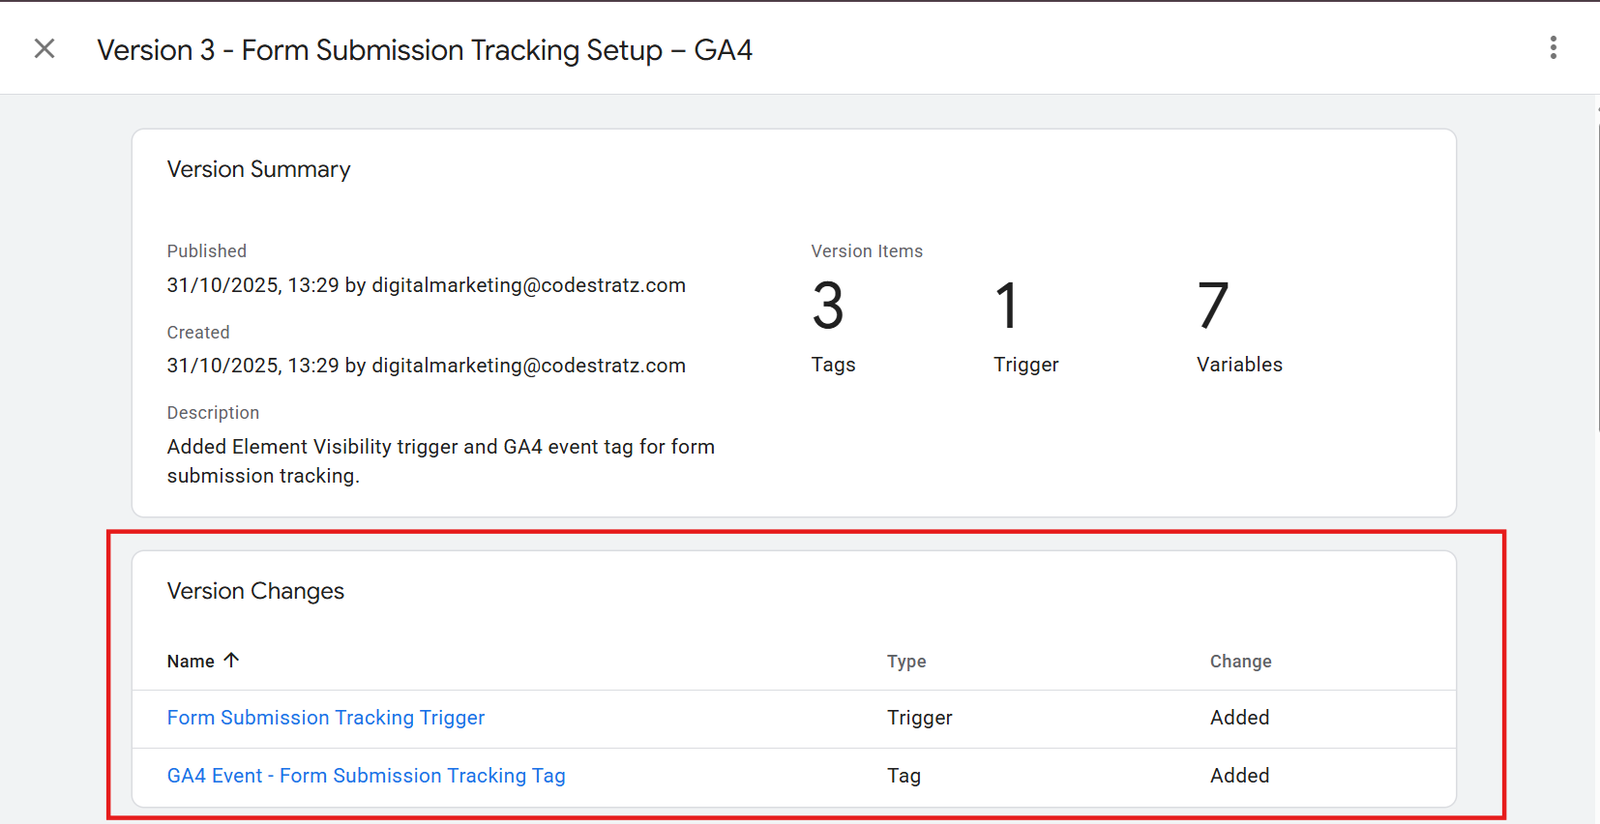
Step 4.8 : Confirm Tag Is Live
After publishing, reload your website and submit the form again.
Open Tag Assistant and ensure the tag fires in the live environment.
You can also check GA4 → Realtime to confirm that new form submission events are being recorded.
You’ve successfully tracked form submissions using Page View Trigger in Google Tag Manager!
Your GA4 dashboard will now capture each form completion, giving you valuable insights into user behaviour and conversion performance.